Managing multiple air conditioners becomes difficult when centralized control and real-time environmental monitoring are needed. By combining infrared control, environmental sensors, Wi-Fi, MQTT, and a web interface, it is possible to build a flexible system that can monitor and control air conditioners from anywhere on the local network or through a remote MQTT service.
This project uses the M5Stack AtomS3R and Unit ENV-III to create a wireless air conditioner control and monitoring system. Each AtomS3R acts as an independent control node, collecting temperature and humidity data, receiving commands over MQTT, and transmitting infrared signals to an air conditioner. A web client provides a centralized interface for monitoring room conditions and adjusting AC settings.
 |
 |
The AtomS3R features a built-in infrared transmitter that can control compatible air conditioners, including common functions such as:
· Power on and off
· Target temperature adjustment
· Fan speed selection
Connected to the AtomS3R through the Grove I2C interface, the Unit ENV-III measures the temperature and humidity near the air conditioner outlet. These readings allow users to observe local environmental conditions and see how they change after an AC command is sent.
Each AtomS3R collects the current AC settings, including power state, target temperature, and fan speed, together with the latest environmental measurements. It then publishes this information over Wi-Fi to an MQTT server.
A web interface subscribes to the relevant MQTT topics and displays the latest status of every AC node. Users can also change the power state, target temperature, and fan speed from the browser. The web application publishes these commands to the corresponding MQTT topics, and the appropriate AtomS3R receives the message and transmits the matching infrared command to the air conditioner.
By assigning a unique identifier and MQTT topic namespace to each node, the same architecture can be expanded to control multiple air conditioners from a single web interface.
The Unit ENV-III is a compact environmental sensor that integrates the SHT30 and QMP6988 sensors. It can measure temperature, relative humidity, and atmospheric pressure, and communicates with the controller over I2C through a Grove connector.
In this project, the Unit ENV-III provides real-time temperature and humidity measurements near the AC outlet.
 |
 |
The AtomS3R is a compact controller based on the ESP32-S3. It includes Wi-Fi and Bluetooth connectivity, a built-in antenna, an infrared transmitter, a color display, and a programmable button located beneath the screen.
Its integrated IR transmitter makes it well suited for controlling devices such as air conditioners and televisions without requiring an additional infrared module. The AtomS3R can be powered from a standard 5 V USB power supply.
In this project, each AtomS3R serves as an AC control node. It reads environmental data from a Unit ENV-III, communicates with the MQTT server over Wi-Fi, and sends infrared commands to the air conditioner.
 |
 |
The system consists of multiple sensing and control nodes, one MQTT server, and one web client.

Multiple Unit ENV-III sensors can be deployed, typically with one sensor connected to each AtomS3R node.
Their main functions are:
· Measure the temperature near the AC outlet
· Measure relative humidity
· Provide environmental data to the connected AtomS3R over I2C
Multiple AtomS3R devices can be deployed to control air conditioners in different rooms or zones.
Each node performs the following tasks:
· Reads temperature and humidity data from its connected Unit ENV-III
· Connects to the MQTT server over Wi-Fi
· Publishes environmental data and current AC status
· Subscribes to AC control topics
· Receives power, temperature, and fan speed commands
· Converts received commands into the corresponding infrared signals
· Transmits IR signals to the target air conditioner
A single MQTT server acts as the communication layer between the AtomS3R nodes and the web client.
Its responsibilities include:
· Receiving telemetry and AC status messages from AtomS3R nodes
· Forwarding control commands from the web client
· Keeping device communication independent from the web interface
· Supporting multiple AC nodes through separate MQTT topic namespaces
The web client provides a centralized control and monitoring interface.
Users can:
· Turn an air conditioner on or off
· Set the target temperature
· Select the fan speed
· View the latest measured temperature
· View the latest measured humidity
· Check the current status of each AC node

This project demonstrates how the AtomS3R can serve as a compact wireless control node for existing infrared air conditioners. With its integrated IR transmitter, Wi-Fi connectivity, display, and ESP32-S3 processor, only a Unit ENV-III sensor and a USB power supply are required to create each monitoring and control node.
MQTT provides a lightweight and scalable communication layer, while the web client offers a convenient way to manage multiple air conditioners from one interface. Additional AtomS3R nodes can be added for new rooms or zones without changing the overall system architecture.
Beyond manual remote control, this platform can also be extended with scheduled operation, temperature-based automation, historical data visualization, alerts, and integration with broader building management or smart home systems.

Search for a mini e-reader and most results tell the same story: a smaller screen inside the same closed device. PaperMono asks a different question: what if a mini E-Ink reader could also be the platform you build your next project on?
Reading habits keep shifting toward digital formats. According to Pew Research Center, the share of U.S. adults who read an e-book in the past year has grown from 17% in 2011 to 31% in its most recent survey, and adoption is even higher among readers under 30. Sleep Foundation research also points out that blue light from backlit phone and tablet screens can interfere with sleep. For readers who want to cut down on that kind of screen exposure before bed, a front-lit E-Ink device can offer a more focused alternative to reaching for a phone or tablet.
PaperMono sits between a mainstream e-reader and an E-Ink development board: it can be used for reading today and customized into a new reader project tomorrow.

The Short Answer
The short answer is that PaperMono is best for readers who want both a usable E-Ink device and the freedom to customize what comes next.
PaperMono is worth a look if you want:
If you want a finished, ecosystem-heavy reading device with a built-in bookstore, PaperMono is not that. More on that below.
A Mini E-Ink Reader for Everyday Reading
With support for CrossPoint Reader firmware, PaperMono can provide an open, ready-to-use reading experience once the firmware is installed. As a compact E-Ink reader, its core reading hardware includes:

More Than a Reader: An Open and Programmable E-Ink Platform
What separates PaperMono from a typical mini e-reader is what's underneath the screen. It's built on the ESP32-S3R8, with 16MB flash and 8MB PSRAM, a foundation for custom firmware, interfaces, and connected applications.
That means the reading firmware isn't the only thing you can run. With support for open-source CrossPoint Reader firmware, PaperMono can serve as a customizable e-reader platform for makers and developers, a meaningfully different starting point from a closed commercial device.

How Is PaperMono Different from a Regular E-Reader?
The difference isn't really about screen size — it's about what you're allowed to do with the device.
|
PaperMono |
A typical mainstream e-reader |
|
|
Firmware |
Supports alternative reader firmware and custom ESP32-S3 development |
Closed, vendor-controlled |
|
Hardware |
Integrated NFC, LoRa, IMU, microSD, and I/O expansion |
Fixed, reading-only |
|
Best fit |
Makers who want to read and build |
Readers who want a finished, dedicated device |
View Full Specifications of PaperMono →
From Reading to Building: What Else PaperMono Can Become
Because PaperMono is a full ESP32 e-ink development terminal, the same hardware that reads a book can become a different project entirely:
Read more about the full hardware behind PaperMono in our product launch announcement.
Is PaperMono the Right Mini E-Reader for You?
Choose PaperMono if you:
1. Want a compact, front-lit, touch-enabled E-Ink reader
2. Like the idea of using and customizing open-source reader firmware
3. Might want to turn your reader into a different project later
4. Are comfortable with a maker-oriented device rather than a polished consumer product
Consider a mainstream e-reader instead if you:
1. Want a built-in bookstore and managed content ecosystem
2. Need commercial reading services, DRM, or cloud synchronization
3. Prefer a completely closed device that requires no customization
Explore What PaperMono Can Become
PaperMono isn't trying to out-spec a mainstream e-reader on screen size or ecosystem. Its case is narrower and more useful for the right person: a mini e-reader you can start reading on today, and an E-Ink reader platform built around open-source reader firmware that you can extend into something else tomorrow. For makers and developers who want to read, experiment, and build beyond the reading experience, PaperMono offers a more flexible place to start.
Check out PaperMono on the M5Stack Store to see full specifications and get started.

Most of us reach for a phone to check the weather, the schedule, or a to-do list, and end up pulled into everything else waiting on that screen. In Deloitte's Global Mobile Consumer Survey, more than one-third of respondents said they checked their phone within five minutes of waking up, while one in five checked it more than 50 times a day. That's the gap an e-ink dashboard is built to fill: a screen you glance at for one piece of information, not one that pulls you in.
This is a concept direction for a PaperMono-based desk information display. The final views would depend on the software implementation and would be built around PaperMono's Wi-Fi, RTC, touchscreen, and frontlight.
What This Concept Covers
Together, these capabilities provide a foundation for an ESP32-S3 E-Ink dashboard project.
Morning: A Weather Glance Without the Phone Pickup
You wake up, reach for PaperMono on the nightstand, and glance at the screen before you're even out of bed. Just a simple, front-lit E-Ink weather readout waiting for you. Behind the scenes, this is Wi-Fi and a low-power E-Ink display doing exactly what a low-power display is good at: information you can glance at, not scroll through.

At the Desk: A Low-Power Calendar and Schedule View
The screen shows today’s schedule: an online webinar from 9:30 to 11:00 AM, clearly visible at a glance. No need to open your calendar app or pick up your phone.

Midday: A Glanceable To-Do List
Somewhere between meetings, you glance over and see your E-Ink to-do list sitting quietly on the desk, no unread notifications in sight. An E-Ink to-do list does not need to manage your entire workflow. It only needs to keep the next important action visible.

Evening: A Quiet Ambient Display to Close the Day
The desk quiets down, and so does the screen: it shifts to a simple E-Ink status view, just enough to glance at without pulling you back into notifications.
It could show tomorrow's first meeting, a short reminder, or a simple end-of-day status.
No constant scrolling, no stream of new alerts, just a quiet display that stays useful until the day is done.
Want to see this kind of dashboard setup in action? Watch the PaperMono dashboard shorts.
What This Concept Represents
This is a concept direction for a PaperMono-based dashboard project. The final views and interactions would depend on the software implementation.
The concept is built around PaperMono's:
These components provide a foundation for building low-power information displays that can change throughout the day.
If you want to see what a reading-focused project on the same hardware looks like, check out A Different Kind of Mini E-Reader.
Try Building It Yourself
One E-Ink screen, a few quiet moments across the day. That's what an ESP32-S3 E-Ink dashboard project on PaperMono could look like.
Curious what's inside the hardware that makes a project like this possible? Explore the PaperMono documentation for hardware and development details, or head to the M5Stack Store to get started.

Today we are going to show you how to integrate the M5Stack TAB5 into Home Assistant, focus on the features of the Habbit Desk PRO, and let you control Home Assistant from your desk.
Index
· Prerequisites
· ESPHome Configuration
· Customizing Habbit Desk PRO
o Interface walkthrough
o Quick device customization
o Home Assistant entities
o Device control
o Notifications and alerts
o Voice assistant
Prerequisites
To integrate the M5Stack TAB5 into Home Assistant and build the Habbit Desk PRO, you’ll need:
· To have ESPHome installed in Home Assistant and a basic understanding of how it works.
· The M5Stack TAB5. The battery is optional, although in my case it will remain permanently connected via USB.
· A USB-C cable for power and data (a charge-only cable will not let you install the software).
· A stand (if you plan to place it on a stable surface) or an enclosure, together with this mount and some magnetic rings (if you want to be able to change the screen orientation).
 |
 |
ESPHome Configuration
To integrate the M5Stack TAB5 into Home Assistant and flash it with the Habbit Desk PRO code, follow these steps:
1. Connect the screen to your computer through the USB-C port.
2. In Home Assistant, open the ESPHome add-on from the sidebar and click “New device”. Click “Continue” and give it a name (for example, “Habbit Desk PRO”).
3. Click “Next” and then select “ESP32-S3” as the device type. You’ll see that a new device has been created in the background.
4. Click “Skip” and then click the “Edit” link for the device you just created. Copy that code and keep it, as we’ll reuse some parts of it.
5. Replace it with this code, making the following adjustments:
o Set name and friendly_name to whatever you want to call your assistant.
o Add the information generated by the add-on in the api section (the encryption key). Do the same for the password field under ota, and for the ssid and password fields under wifi and ap.
o That’s enough for now, since I’d rather you start customizing it after I explain how each section works.
substitutions:
# Device customization
# Personalización del dispositivo
name: habbit-desk-pro
friendly_name: Habbit Desk PRO
background_color: 0x000000
text_color: 0xFFFFFF
text_color_secondary: 0x767676
iddle_time: 20s
animation_active: https://aguacatec.es/wp-content/uploads/2026/04/anim_active-1.png
animation_iddle: https://aguacatec.es/wp-content/uploads/2026/04/anim_iddle-1.png
animation_alert: https://aguacatec.es/wp-content/uploads/2026/04/notification-1.png
icon_ha: https://aguacatec.es/wp-content/uploads/2026/04/icon_ha.png
image_3dprinter: https://aguacatec.es/wp-content/uploads/2026/04/3dprinter_enclosed.png
image_vacuum: https://aguacatec.es/wp-content/uploads/2026/04/vacuum.png
# Entities
# Entidades
weather_condition: weather.openweathermap
room_temperature: sensor.sensor_temperatura_estudio_temperature
room_humidity: sensor.sensor_temperatura_estudio_humidity
room_co2: sensor.wifi_smart_switch_calidad_del_aire
notifications: input_text.notificaciones_habbit_desk
calendar: sensor.calendar
media: media_player.laptopchuwi
goal_current: sensor.aguacatec_suscriptores
goal_target: 3000
goal_text: "A por los 3000 subs"
light_ceiling: light.ventilador_estudio
cover1: cover.estor_estudio_1
cover2: cover.estor_estudio_2
climate: climate.salon
dehumidifier: humidifier.deshumidificador_estudio
fan_ceiling: fan.ventilador_estudio
light_bar: switch.regleta_usb_escritorio_l2
printer: switch.impresora
printer_3d: switch.impresora_3d
printer_3d_octoprint_status: switch.regleta_usb_herramientas_center
printer_3d_octoprint_file: sensor.octoprint_current_file
printer_3d_octoprint_temp_bed: sensor.octoprint_actual_bed_temp
printer_3d_octoprint_temp_hotend: sensor.octoprint_actual_tool0_temp
printer_3d_octoprint_operation: sensor.octoprint_current_state
printer_3d_octoprint_progress: sensor.octoprint_job_percentage
printer_3d_octoprint_finish: sensor.octoprint_estimated_finish_time
printer_3d_pause_button: button.octoprint_pause_job
printer_3d_resume_button: button.octoprint_resume_job
printer_3d_stop_button: button.octoprint_stop_job
vacuum: vacuum.roborock_qr_598
vacuum_water: binary_sensor.roborock_qr_598_escasez_de_agua
vacuum_error: sensor.roborock_qr_598_error_de_aspirador
vacuum_current_room: sensor.roborock_qr_598_habitacion_actual
vacuum_cleaning_progress: sensor.roborock_qr_598_progreso_de_la_limpieza
vacuum_cleaning_time: sensor.roborock_qr_598_tiempo_de_limpieza
vacuum_last_clean: sensor.roborock_qr_598_finalizacion_de_la_ultima_limpieza
# Other settings
# Otros ajustes
allowed_characters: " []¿?¡!#%'()+,-—_./:µ³°ªº0123456789ABCDEFGHIJKLMNÑOPQRSTUVWYZabcdefghijklmnñopqrstuvwxyzáéíóúÁÉÍÓÚäëïöü"
################################################################################################################
esphome:
name: ${name}
friendly_name: ${friendly_name}
on_boot:
priority: -100
then:
## Speaker
## Altavoz
- switch.turn_on: speaker_enable
- delay: 500ms
- select.set:
id: dac_output_select
option: LINE1
- delay: 500ms
- media_player.volume_set:
id: speaker_player
volume: 1
## Animation
## Animación
- lambda: |-
lv_obj_t* obj = id(animation_widget);
int32_t base_y = lv_obj_get_y(obj);
static lv_anim_t anim;
lv_anim_init(&anim);
lv_anim_set_var(&anim, obj);
lv_anim_set_exec_cb(&anim, [](void* o, int32_t v) {
lv_obj_set_y((lv_obj_t*)o, v);
});
lv_anim_set_values(&anim, base_y, base_y + 30);
lv_anim_set_duration(&anim, 2200);
lv_anim_set_playback_duration(&anim, 2200);
lv_anim_set_repeat_count(&anim, LV_ANIM_REPEAT_INFINITE);
lv_anim_set_path_cb(&anim, lv_anim_path_ease_in_out);
lv_anim_start(&anim);
- component.update: ina226_sensor
- delay: 500ms
- component.update: battery_percentage
esp32:
board: esp32-p4-evboard
flash_size: 16MB
framework:
type: esp-idf
advanced:
enable_idf_experimental_features: true
esp32_hosted:
variant: esp32c6
active_high: true
clk_pin: GPIO12
cmd_pin: GPIO13
d0_pin: GPIO11
d1_pin: GPIO10
d2_pin: GPIO9
d3_pin: GPIO8
reset_pin: GPIO15
slot: 1
logger:
hardware_uart: USB_SERIAL_JTAG
psram:
mode: hex
speed: 200MHz
api:
encryption:
key: "Fdasdas+OaKt1XvQV9pU6dsaadsads"
ota:
- platform: esphome
password: "2r3d3908b12744trgwds"
wifi:
ssid: !secret wifi_ssid
password: !secret wifi_password
ap:
ssid: "M5Stack-Tab5 Fallback Hotspot"
password: "ewfef3Mt2rd"
audio_dac:
- platform: es8388
id: es8388_dac
audio_adc:
- platform: es7210
id: es7210_adc
bits_per_sample: 16bit
sample_rate: 16000
# Sensors configuration
# Configuración de sensores
binary_sensor:
- platform: gpio
id: charging
name: "Carga"
icon: mdi:battery-charging
pin:
pi4ioe5v6408: pi4ioe2
number: 6
mode: INPUT_PULLDOWN
filters:
- delayed_on: 2s
- delayed_off: 2s
on_state:
then:
- lvgl.label.update:
id: lbl_battery_percentage
text:
format: "%.0f%%"
args:
- id(battery_percentage).state
- lvgl.label.update:
id: battery_icon
text: !lambda |-
if (id(charging).state) return "\U0000f250";
float pct = x;
if (pct >= 70.0) return "\U0000f24f";
if (pct >= 30.0) return "\U0000f255";
return "\U0000f257";
text_color: !lambda |-
float pct = id(battery_percentage).state;
if (id(charging).state) return lv_color_hex(0xe6b854);
if (pct >= 70.0) return lv_color_hex(0xc9e654);
if (pct >= 30.0) return lv_color_hex(0xe65476);
return lv_color_hex(0x767676);
- platform: gpio
id: headphone_detect
name: "Headphone Detect"
internal: true
pin:
pi4ioe5v6408: pi4ioe1
number: 7
# Devices
# Dispositivos
# VACUUM
- platform: homeassistant
id: device_vacuum_water
entity_id: ${vacuum_water}
internal: true
filters:
- delayed_on: 10min
on_press:
then:
- lvgl.label.update:
id: lbl_device_vacuum_water
text_color: 0xe65470
- lvgl.image.update:
id: icon_vacuum_water_state
image_recolor: 0xe65470
on_release:
then:
- lvgl.label.update:
id: lbl_device_vacuum_water
text_color: 0x767676
- lvgl.image.update:
id: icon_vacuum_water_state
image_recolor: 0x767676
esp_ldo:
- voltage: 2.5V
channel: 3
font:
# Interface
# Interfaz
- file: "gfonts://Figtree"
id: font_clock
size: 160
glyphs: ${allowed_characters}
- file: "gfonts://Material+Symbols+Outlined"
id: font_info_icons
size: 40
glyphs: [
"\U0000f24f", # 100%
"\U0000f255", # 50%
"\U0000f257", # 10%
"\U0000f250", # Charging
"\U0000e98e", # Speaker ON
"\U0000e04f", # Speaker OFF
]
- file: "gfonts://Material+Symbols+Outlined"
id: font_info_icons_little
size: 40
glyphs: [
"\U0000f654", # Alert
"\U0000e63e", # Wifi ON
"\U0000e648", # Wifi OFF
"\U0000e1ff", # thermometer
"\U0000f87e", # water-percent
"\U0000e29c", # air
"\U0000e834", # check
"\U0000e62e", # assistant
]
- file: "gfonts://Figtree"
id: font_notification
size: 70
glyphs: ${allowed_characters}
# Weather
# Meteorología
- file: "gfonts://Material+Symbols+Outlined"
id: font_top_icons
size: 70
glyphs: [
"\U0000e81a", # wb_sunny (sol)
"\U0000e818", # cloud (nube)
"\U0000f176", # umbrella (lluvia)
"\U0000e810", # water_drop (gotas)
"\U0000e80b", # ac_unit (nieve)
"\U0000efd8", # air (viento)
"\U0000ea0b", # thunderstorm (tormenta)
"\U0000f159", # nights_stay (noche)
]
- file: "gfonts://Kanit"
id: font_info_text
size: 35
glyphs: ${allowed_characters}
- file: "gfonts://Material+Symbols+Outlined"
id: font_device_icons
size: 120
glyphs: [
"\U0000f02a", # ceiling-light
"\U0000f168", # fan
"\U0000e286", # blinds-shade
"\U0000ec1f", # blinds-shade-close
"\U0000ec12", # roller-shade
"\U0000ec11", # roller-shade-close
"\U0000ed38", # 3d
"\U0000ef55", # fire
"\U0000efc5", # vacuum
"\U0000f7ed", # led-strip
"\U0000e97e", # dehumidifier
"\U0000e1c4", # play
"\U0000e1a2", # pause
"\U0000eaaa", # base
"\U0000eee1", # locate
"\U0000f418", # power
"\U0000ef71", # stop
"\U0000ebfe", # spotlight
" ",
]
- file: "gfonts://Material+Symbols+Outlined"
id: font_device_icons_little
size: 60
glyphs: [
"\U0000e879", # exit
"\U0000e548", # more
"\U0000e834", # check
" ",
]
- file: "gfonts://Material+Symbols+Outlined"
id: font_details_icons
size: 60
glyphs: [
"\U0000e286", # blinds-shade
"\U0000ec1f", # blinds-shade-close
" ",
]
- file: "gfonts://Kanit"
id: font_value
size: 60
glyphs: ${allowed_characters}
- file: "gfonts://Kanit"
id: font_device_status
size: 30
glyphs: ${allowed_characters}
- file: "gfonts://Kanit"
id: font_device_name
size: 35
glyphs: ${allowed_characters}
- file: "gfonts://Kanit"
id: font_values
size: 30
glyphs: ${allowed_characters}
globals:
## Notifications
## Notificaciones
- id: notification
type: bool
restore_value: no
initial_value: 'false'
- id: notification_last_changed
type: time_t
restore_value: yes
initial_value: '0'
- id: notification_last_text
type: std::string
restore_value: yes
max_restore_data_length: 254
initial_value: '""'
i2c:
- id: bsp_bus
sda: GPIO31
scl: GPIO32
frequency: 400kHz
i2s_audio:
- id: mic_bus
i2s_lrclk_pin: GPIO29
i2s_bclk_pin: GPIO27
i2s_mclk_pin: GPIO30
image:
## Customization
## Personalización
- file: ${animation_active}
id: img_animation_active
resize: 400x400
type: RGB565
transparency: alpha_channel
- file: ${animation_iddle}
id: img_animation_iddle
resize: 400x400
type: RGB565
transparency: alpha_channel
- file: ${animation_alert}
id: img_animation_alert
resize: 400x400
type: RGB565
transparency: alpha_channel
## Icons
## Iconos
- file: ${icon_ha}
id: img_icon_ha
resize: 100x100
type: RGB565
transparency: alpha_channel
- file: mdi:calendar
id: icon_calendar_mini
resize: 60x60
type: BINARY
transparency: chroma_key
- file: mdi:check-bold
id: icon_check
resize: 60x60
type: BINARY
transparency: chroma_key
- file: mdi:alert-decagram-outline
id: icon_notification
resize: 400x400
type: BINARY
transparency: chroma_key
- file: mdi:microphone
id: icon_assist_active
resize: 400x400
type: BINARY
transparency: chroma_key
- file: mdi:timer-sand
id: icon_assist_thinking
resize: 400x400
type: BINARY
transparency: chroma_key
- file: mdi:check-bold
id: icon_assist_success
resize: 400x400
type: BINARY
transparency: chroma_key
- file: mdi:music
id: icon_music_mini
resize: 60x60
type: BINARY
transparency: chroma_key
- file: mdi:play-pause
id: icon_music_toggle
resize: 60x60
type: BINARY
transparency: chroma_key
- file: mdi:skip-previous
id: icon_music_previous
resize: 60x60
type: BINARY
transparency: chroma_key
- file: mdi:skip-next
id: icon_music_next
resize: 60x60
type: BINARY
transparency: chroma_key
- file: mdi:youtube
id: icon_youtube_mini
resize: 60x60
type: BINARY
transparency: chroma_key
- file: mdi:robot-vacuum
id: icon_vacuum
resize: 110x110
type: BINARY
transparency: chroma_key
- file: mdi:robot-vacuum
id: icon_vacuum_mini
resize: 60x60
type: BINARY
transparency: chroma_key
- file: mdi:water
id: icon_vacuum_water
resize: 40x40
type: BINARY
transparency: chroma_key
- file: mdi:robot-vacuum-alert
id: icon_vacuum_error
resize: 40x40
type: BINARY
transparency: chroma_key
- file: mdi:printer-3d-nozzle
id: icon_3dprinter
resize: 100x100
type: BINARY
transparency: chroma_key
- file: mdi:printer-3d-nozzle
id: icon_3dprinter_mini
resize: 60x60
type: BINARY
transparency: chroma_key
- file: mdi:printer-3d-nozzle
id: icon_3dprinter_hotend
resize: 40x40
type: BINARY
transparency: chroma_key
- file: mdi:square
id: icon_3dprinter_bed
resize: 40x40
type: BINARY
transparency: chroma_key
## Devices
## Dispositivos
- file: ${image_3dprinter}
id: img_3dprinter
resize: 500x500
type: RGB565
transparency: alpha_channel
- file: ${image_vacuum}
id: img_vacuum
resize: 430x430
type: RGB565
transparency: alpha_channel
interval:
- interval: 60s
then:
- lvgl.label.update:
id: lbl_clock
text: !lambda 'return id(esptime).now().strftime("%H:%M");'
- interval: 10s
then:
- if:
condition:
lambda: 'return !id(notification);'
then:
- lvgl.image.update:
id: animation_widget
src: img_animation_iddle
- delay: 1s
- lvgl.image.update:
id: animation_widget
src: img_animation_active
## Calendar
## Calendario
- interval: 5min
then:
- script.execute: refresh_calendar_widget
- interval: 60s
then:
- lvgl.bar.update:
id: lbl_home_calendar_progress_bar
value: !lambda |-
if (id(calendar_state).state != "on")
return 0;
if (!id(calendar_event_start).has_state() || !id(calendar_event_end).has_state())
return 0;
std::string start = id(calendar_event_start).state;
std::string end_s = id(calendar_event_end).state;
if (start.empty() || end_s.empty())
return 0;
int sy, sm, sd, sh, smin, ss, ey, em, ed, eh, emin, es;
sscanf(start.c_str(), "%d-%d-%d %d:%d:%d", &sy, &sm, &sd, &sh, &smin, &ss);
sscanf(end_s.c_str(), "%d-%d-%d %d:%d:%d", &ey, &em, &ed, &eh, &emin, &es);
auto now = id(esptime).now();
if (!now.is_valid()) return 0;
int now_mins = now.hour * 60 + now.minute;
int start_mins = sh * 60 + smin;
int end_mins = eh * 60 + emin;
if (now_mins < start_mins) return 0;
if (now_mins >= end_mins) return 100;
return (int)(((float)(now_mins - start_mins) / (end_mins - start_mins)) * 100.0f);
light:
- platform: monochromatic
output: backlight_pwm
name: "Pantalla"
id: backlight
icon: mdi:tablet
restore_mode: ALWAYS_ON
media_player:
- platform: speaker
name: "Habbit Desk PRO"
id: speaker_player
announcement_pipeline:
speaker: tab5_speaker
format: FLAC
sample_rate: 48000
num_channels: 1
on_announcement:
# Stop the wake word (mWW or VA) if the mic is capturing
- if:
condition:
- microphone.is_capturing:
then:
- micro_wake_word.stop:
on_idle:
# Since VA isn't running, this is the end of user-intiated media playback. Restart the wake word.
- if:
condition:
not:
voice_assistant.is_running:
then:
- micro_wake_word.start:
microphone:
- platform: i2s_audio
id: tab5_microphone
i2s_din_pin: GPIO28
sample_rate: 16000
bits_per_sample: 16bit
adc_type: external
micro_wake_word:
id: mww
models:
- okay_nabu
# - hey_mycroft
# - hey_jarvis
on_wake_word_detected:
- voice_assistant.start:
wake_word: !lambda return wake_word;
- lvgl.page.show: page_assistant
- light.turn_on: backlight
- lvgl.resume:
- lvgl.widget.redraw:
output:
- platform: ledc
pin: GPIO22
id: backlight_pwm
frequency: 1000Hz
pi4ioe5v6408:
- id: pi4ioe1
address: 0x43
# 0: O - wifi_antenna_int_ext
# 1: O - speaker_enable
# 2: O - external_5v_power
# 3: NC
# 4: O - lcd reset
# 5: O - touch panel reset
# 6: O - camera reset
# 7: I - headphone detect
- id: pi4ioe2
address: 0x44
# 0: O - wifi_power
# 1: NC
# 2: NC
# 3: O - usb_5v_power
# 4: O - poweroff pulse
# 5: O - quick charge enable (inverted)
# 6: I - charging status
# 7: O - charge enable
script:
- id: refresh_calendar_widget
then:
- lvgl.image.update:
id: icon_calendar_mini_id
image_recolor: !lambda |-
if (!id(calendar_event_start).has_state()) return lv_color_hex(0xFFFFFF);
std::string start = id(calendar_event_start).state;
if (start.empty()) return lv_color_hex(0xFFFFFF);
int sy, sm, sd, sh, smin, ss;
if (sscanf(start.c_str(), "%d-%d-%d %d:%d:%d", &sy, &sm, &sd, &sh, &smin, &ss) != 6) {
return lv_color_hex(0xFFFFFF);
}
auto now = id(esptime).now();
if (!now.is_valid()) return lv_color_hex(0xFFFFFF);
bool is_today = (now.year == sy && now.month == sm && now.day_of_month == sd);
bool calendar_off = (id(calendar_state).state == "off");
if (is_today && calendar_off) return lv_color_hex(0x1EBBD7);
return lv_color_hex(0xFFFFFF);
- lvgl.label.update:
id: lbl_home_calendar_event_name
text: !lambda |-
if (!id(calendar_event_name).has_state()) return std::string("Sin eventos");
std::string s = id(calendar_event_name).state;
if (s.length() > 40) return (s.substr(0, 37) + "...").c_str();
return s.c_str();
text_color: !lambda |-
if (!id(calendar_event_start).has_state()) return lv_color_hex(0xFFFFFF);
std::string start = id(calendar_event_start).state;
if (start.empty()) return lv_color_hex(0xFFFFFF);
int sy, sm, sd, sh, smin, ss;
if (sscanf(start.c_str(), "%d-%d-%d %d:%d:%d", &sy, &sm, &sd, &sh, &smin, &ss) != 6) {
return lv_color_hex(0xFFFFFF);
}
auto now = id(esptime).now();
if (!now.is_valid()) return lv_color_hex(0xFFFFFF);
bool is_today = (now.year == sy && now.month == sm && now.day_of_month == sd);
bool calendar_off = (id(calendar_state).state == "off");
if (is_today && calendar_off) return lv_color_hex(0x1EBBD7);
return lv_color_hex(0xFFFFFF);
- lvgl.label.update:
id: lbl_home_calendar_event_details
text: !lambda |-
if (!id(calendar_event_start).has_state() || !id(calendar_event_end).has_state())
return std::string("Sin eventos");
std::string start = id(calendar_event_start).state;
std::string end_s = id(calendar_event_end).state;
if (start.empty() || end_s.empty()) return std::string("Sin eventos");
int sy, sm, sd, sh, smin, ss, ey, em, ed, eh, emin, es;
sscanf(start.c_str(), "%d-%d-%d %d:%d:%d", &sy, &sm, &sd, &sh, &smin, &ss);
sscanf(end_s.c_str(), "%d-%d-%d %d:%d:%d", &ey, &em, &ed, &eh, &emin, &es);
static const int t[] = {0, 3, 2, 5, 0, 3, 5, 1, 4, 6, 2, 4};
int yr = sy; if (sm < 3) yr--;
int dow = (yr + yr/4 - yr/100 + yr/400 + t[sm-1] + sd) % 7;
const char* dias[] = {"Dom", "Lun", "Mar", "Mie", "Jue", "Vie", "Sab"};
char buf[35];
sprintf(buf, "%s %02d/%02d/%02d, %02d:%02d-%02d:%02d",
dias[dow], sd, sm, sy % 100, sh, smin, eh, emin);
return std::string(buf);
text_color: !lambda |-
if (!id(calendar_event_start).has_state()) return lv_color_hex(0xFFFFFF);
std::string start = id(calendar_event_start).state;
if (start.empty()) return lv_color_hex(0xFFFFFF);
int sy, sm, sd, sh, smin, ss;
if (sscanf(start.c_str(), "%d-%d-%d %d:%d:%d", &sy, &sm, &sd, &sh, &smin, &ss) != 6) {
return lv_color_hex(0xFFFFFF);
}
auto now = id(esptime).now();
if (!now.is_valid()) return lv_color_hex(0xFFFFFF);
bool is_today = (now.year == sy && now.month == sm && now.day_of_month == sd);
bool calendar_off = (id(calendar_state).state == "off");
if (is_today && calendar_off) return lv_color_hex(0x1EBBD7);
return lv_color_hex(0xFFFFFF);
select:
- platform: template
id: wifi_antenna_select
name: "WiFi Antenna"
internal: True
options:
- "Internal"
- "External"
optimistic: true
on_value:
- if:
condition:
lambda: return i == 0;
then:
- switch.turn_off: wifi_antenna_int_ext
else:
- switch.turn_on: wifi_antenna_int_ext
## The DAC Output select needs to be manually (or with an automation) changed to `LINE1` for the onboard speaker
- platform: es8388
es8388_id: es8388_dac
dac_output:
name: DAC Output
id: dac_output_select
adc_input_mic:
name: ADC Input Mic
sensor:
# Built-in sensors
# Sensores internos
- platform: wifi_signal
name: "Intensidad WiFi"
update_interval: 300s
on_value:
then:
- lvgl.label.update:
id: wifi_icon
text: !lambda |-
if (std::isnan(x)) return "\U0000e648"; // wifi off - sin conexión
return "\U0000e63e"; // wifi on
text_color: !lambda |-
if (std::isnan(x)) return lv_color_hex(0x767676); // wifi off - sin conexión
return lv_color_hex(0xffffff); // wifi on
- platform: ina226
id: ina226_sensor
address: 0x41
adc_averaging: 16
max_current: 8.192A
shunt_resistance: 0.005ohm
bus_voltage:
name: Battery Voltage
id: battery_voltage
internal: true
current:
name: Battery Current
internal: true
- platform: template
name: "Batería"
id: battery_percentage
unit_of_measurement: "%"
accuracy_decimals: 0
device_class: battery
state_class: measurement
lambda: |-
// Define los voltajes mínimo y máximo de tu batería
float voltage_max = 8.23; // Voltaje máximo (batería llena)
float voltage_min = 6.0; // Voltaje mínimo (batería vacía)
float voltage = id(battery_voltage).state;
// Calcula el porcentaje
float percentage = (voltage - voltage_min) / (voltage_max - voltage_min) * 100.0;
// Limita el porcentaje entre 0 y 100
if (percentage > 100.0) percentage = 100.0;
if (percentage < 0.0) percentage = 0.0;
return percentage;
update_interval: 600s
on_value:
then:
- lvgl.label.update:
id: lbl_battery_percentage
text:
format: "%.0f%%"
args:
- id(battery_percentage).state
- lvgl.label.update:
id: battery_icon
text: !lambda |-
if (id(charging).state) return "\U0000f250";
float pct = x;
if (pct >= 70.0) return "\U0000f24f";
if (pct >= 30.0) return "\U0000f255";
return "\U0000f257";
text_color: !lambda |-
float pct = id(battery_percentage).state;
if (std::isnan(pct)) return lv_color_hex(0x767676);
if (id(charging).state) return lv_color_hex(0xe6b854);
if (pct >= 70.0) return lv_color_hex(0xc9e654);
if (pct >= 30.0) return lv_color_hex(0xe65476);
return lv_color_hex(0x767676);
## Climate
## Climatización
- platform: homeassistant
id: room_temperature_value
entity_id: ${room_temperature}
internal: true
on_value:
then:
- lvgl.label.update:
id: lbl_room_temperature
text:
format: "%.0f°C"
args:
- id(room_temperature_value).state
text_color: !lambda |-
float t = id(room_temperature_value).state;
if (t < 18.0) return lv_color_hex(0x1e9cd7);
if (t > 25.0) return lv_color_hex(0xe65476);
return lv_color_hex(0x626262);
- lvgl.label.update:
id: thermometer_icon
text_color: !lambda |-
float t = id(room_temperature_value).state;
if (t < 18.0) return lv_color_hex(0x1e9cd7);
if (t > 25.0) return lv_color_hex(0xe65476);
return lv_color_hex(0x626262);
- if:
condition:
lambda: 'return id(room_temperature_value).state < 23.0;'
then:
- lvgl.widget.show: btn_climate
- lvgl.widget.hide: btn_fan
else:
- lvgl.widget.hide: btn_climate
- lvgl.widget.show: btn_fan
- platform: homeassistant
id: room_humidity_value
entity_id: ${room_humidity}
internal: true
on_value:
then:
- lvgl.label.update:
id: lbl_room_humidity
text:
format: "%.0f%%"
args:
- id(room_humidity_value).state
text_color: !lambda |-
float t = id(room_humidity_value).state;
if (t < 40.0) return lv_color_hex(0xe0a020);
if (t > 60.0) return lv_color_hex(0x1e9cd7);
return lv_color_hex(0x626262);
- lvgl.label.update:
id: humidity_icon
text_color: !lambda |-
float t = id(room_humidity_value).state;
if (t < 40.0) return lv_color_hex(0xe0a020);
if (t > 60.0) return lv_color_hex(0x1e9cd7);
return lv_color_hex(0x626262);
## Media
## Media
- platform: homeassistant
id: media_duration
entity_id: ${media}
attribute: media_duration
internal: true
- platform: homeassistant
id: media_position
entity_id: ${media}
attribute: media_position
internal: true
on_value:
then:
- lvgl.bar.update:
id: lbl_home_media_progress_bar
value: !lambda |-
float dur = id(media_duration).state;
float pos = id(media_position).state;
if (dur <= 0) return 0;
return (int)((pos / dur) * 100.0f);
# Devices
# Dispositivos
# YOUTUBE
- platform: homeassistant
id: goal_current_value
entity_id: ${goal_current}
internal: true
filters:
- lambda: |-
if (isnan(x)) return 0;
return x;
on_value:
then:
- lvgl.bar.update:
id: lbl_home_goal_progress_bar
value: !lambda return (int)x;
- lvgl.label.update:
id: lbl_home_goal_current
text: !lambda |-
char buf[30];
snprintf(buf, sizeof(buf), "%.0f Suscriptores", x);
return std::string(buf);
- lvgl.label.update:
id: lbl_home_goal_progress_value
text: !lambda |-
int pct = (int)(x / 3000.0f * 100.0f);
char buf[10];
snprintf(buf, sizeof(buf), "%d%%", pct);
return std::string(buf);
# COVER
- platform: homeassistant
id: cover_1_position_value
entity_id: ${cover1}
attribute: current_position
internal: true
filters:
- lambda: |-
if (isnan(x)) { return 0; }
else { return x; }
on_value:
then:
- lvgl.slider.update:
id: slider_cover_1
value: !lambda 'return (int)x;'
- lambda: |-
int position = (int) id(cover_1_position_value).state;
char buf[8];
snprintf(buf, sizeof(buf), "%d%%", position);
// Actualizar texto del label LVGL
lv_label_set_text(id(slider_cover_1_value), buf);
- platform: homeassistant
id: cover_2_position_value
entity_id: ${cover2}
attribute: current_position
internal: true
filters:
- lambda: |-
if (isnan(x)) { return 0; }
else { return x; }
on_value:
then:
- lvgl.slider.update:
id: slider_cover_2
value: !lambda 'return (int)x;'
- lambda: |-
int position = (int) id(cover_2_position_value).state;
char buf[8];
snprintf(buf, sizeof(buf), "%d%%", position);
// Actualizar texto del label LVGL
lv_label_set_text(id(slider_cover_2_value), buf);
# 3D PRINTER
- platform: homeassistant
id: printer_3d_octoprint_temp_bed
entity_id: ${printer_3d_octoprint_temp_bed}
internal: true
filters:
- lambda: |-
if (isnan(x)) { return 0; }
else { return x; }
on_value:
then:
- lvgl.label.update:
id: lbl_device_printer_3d_octoprint_temp_bed
text:
format: "Tª Cama %.0f %ºC"
args:
- id(printer_3d_octoprint_temp_bed).state
- platform: homeassistant
id: printer_3d_octoprint_temp_hotend
entity_id: ${printer_3d_octoprint_temp_hotend}
internal: true
filters:
- lambda: |-
if (isnan(x)) { return 0; }
else { return x; }
on_value:
then:
- lvgl.label.update:
id: lbl_device_printer_3d_octoprint_temp_hotend
text:
format: "Tª Extrusor %.0f %ºC"
args:
- id(printer_3d_octoprint_temp_hotend).state
- platform: homeassistant
id: printer_3d_octoprint_progress_value
entity_id: ${printer_3d_octoprint_progress}
internal: true
filters:
- lambda: |-
if (isnan(x)) { return 0; }
else { return x; }
on_value:
then:
- lvgl.bar.update:
id: lbl_device_printer_3d_progress_bar
value: !lambda return (int)x;
- lvgl.label.update:
id: lbl_device_printer_3d_progress_value
text:
format: "%.0f%%"
args: ['x']
- lvgl.bar.update:
id: lbl_home_printer_3d_progress_bar
value: !lambda return (int)x;
- lvgl.label.update:
id: lbl_home_printer_3d_progress_value
text:
format: "%.0f%%"
args: ['x']
- if:
condition:
lambda: 'return x > 0;'
then:
- lvgl.widget.show: widget_progress_3dprinter
else:
- lvgl.widget.hide: widget_progress_3dprinter
# VACUUM
- platform: homeassistant
id: vacuum_cleaning_progress_value
entity_id: ${vacuum_cleaning_progress}
internal: true
filters:
- lambda: |-
if (isnan(x)) { return 0; }
else { return x; }
on_value:
then:
- lvgl.bar.update:
id: lbl_device_vacuum_progress_bar
value: !lambda return (int)x;
- lvgl.label.update:
id: lbl_device_vacuum_progress_value
text:
format: "%.0f%%"
args: ['x']
- lvgl.bar.update:
id: lbl_home_vacuum_progress_bar
value: !lambda return (int)x;
- lvgl.label.update:
id: lbl_home_vacuum_progress_value
text:
format: "%.0f%%"
args: ['x']
- if:
condition:
lambda: 'return x > 0;'
then:
- lvgl.widget.show: widget_progress_vacuum
else:
- lvgl.widget.hide: widget_progress_vacuum
- platform: homeassistant
id: vacuum_cleaning_time_value
entity_id: ${vacuum_cleaning_time}
internal: true
on_value:
then:
- lvgl.label.update:
id: lbl_device_vacuum_cleaning_time
text: !lambda |-
if (isnan(x) || x <= 0) {
return std::string("Ninguna limpieza en curso");
}
int minutes = (int)x;
int hours = minutes / 60;
int mins = minutes % 60;
char buffer[40];
if (hours > 0) {
snprintf(buffer, sizeof(buffer), "Limpiando %dh %02dm", hours, mins);
} else {
snprintf(buffer, sizeof(buffer), "Limpiando %dm", minutes);
}
return std::string(buffer);
- lvgl.label.update:
id: lbl_home_vacuum_cleaning_time
text: !lambda |-
if (isnan(x) || x <= 0) {
return std::string("Ninguna limpieza en curso");
}
int minutes = (int)x;
int hours = minutes / 60;
int mins = minutes % 60;
char buffer[40];
if (hours > 0) {
snprintf(buffer, sizeof(buffer), "Limpiando %dh %02dm", hours, mins);
} else {
snprintf(buffer, sizeof(buffer), "Limpiando %dm", minutes);
}
return std::string(buffer);
switch:
- platform: gpio
id: wifi_power
name: "WiFi"
internal: true
pin:
pi4ioe5v6408: pi4ioe2
number: 0
restore_mode: ALWAYS_ON
- platform: gpio
id: usb_5v_power
name: "USB Power"
internal: true
pin:
pi4ioe5v6408: pi4ioe2
number: 3
- platform: gpio
id: quick_charge
name: "Quick Charge"
internal: true
pin:
pi4ioe5v6408: pi4ioe2
number: 5
inverted: true
- platform: gpio
id: charge_enable
name: "Carga"
restore_mode: ALWAYS_OFF
internal: False
pin:
pi4ioe5v6408: pi4ioe2
number: 7
- platform: gpio
id: wifi_antenna_int_ext
internal: True
pin:
pi4ioe5v6408: pi4ioe1
number: 0
- platform: gpio
id: speaker_enable
name: "Altavoz"
icon: mdi:volume-high
pin:
pi4ioe5v6408: pi4ioe1
number: 1
on_state:
then:
- lvgl.label.update:
id: speaker_icon
text: !lambda |-
if (id(speaker_enable).state) return "\U0000e98e";
return "\U0000e04f";
text_color: !lambda |-
if (id(speaker_enable).state) return lv_color_hex(0xffffff);
return lv_color_hex(0x767676);
- platform: gpio
id: external_5v_power
name: "External 5V Power"
internal: true
pin:
pi4ioe5v6408: pi4ioe1
number: 2
text_sensor:
## Weather
## Meteorología
- platform: homeassistant
id: weather_condition_value
entity_id: ${weather_condition}
internal: true
on_value:
then:
- lvgl.label.update:
id: weather_icon
text: !lambda |-
if (x == "sunny") return "\U0000e81a"; // wb_sunny
if (x == "partlycloudy") return "\U0000e818"; // wb_cloudy
if (x == "cloudy") return "\U0000e818"; // cloud
if (x == "rainy") return "\U0000f176"; // umbrella
if (x == "pouring") return "\U0000e810"; // water_drop
if (x == "snowy") return "\U0000e80b"; // ac_unit
if (x == "fog") return "\U0000e818"; // cloud (niebla)
if (x == "windy") return "\U0000efd8"; // air
if (x == "lightning" || x == "lightning-rainy") return "\U0000ea0b"; // thunderstorm
if (x == "clear-night") return "\U0000f159"; // nights_stay
return "\U0000e818"; // cloud
text_color: !lambda |-
if (x == "sunny") return lv_color_hex(0xe6b454);
if (x == "partlycloudy") return lv_color_hex(0xFFFFFF);
if (x == "cloudy") return lv_color_hex(0xFFFFFF);
if (x == "rainy") return lv_color_hex(0x8bc1dd);
if (x == "pouring") return lv_color_hex(0x8bc1dd);
if (x == "snowy") return lv_color_hex(0xFFFFFF);
if (x == "fog") return lv_color_hex(0xFFFFFF);
if (x == "windy") return lv_color_hex(0x8bc1dd);
if (x == "lightning" || x == "lightning-rainy") return lv_color_hex(0xe6b454);
if (x == "clear-night") return lv_color_hex(0xf2eb81);
return lv_color_hex(0xFFFFFF);
- platform: homeassistant
id: room_co2_value
entity_id: ${room_co2}
internal: true
on_value:
then:
- lvgl.label.update:
id: lbl_room_co2
text: !lambda |-
if (x == "poor") return "KO";
return "OK";
text_color: !lambda |-
if (x == "poor") return lv_color_hex(0xe65476);
return lv_color_hex(0x626262);
- lvgl.label.update:
id: co2_icon
text_color: !lambda |-
if (x == "poor") return lv_color_hex(0xe65476);
return lv_color_hex(0x626262);
## Notifications
## Notificaciones
- platform: homeassistant
id: notification_text
entity_id: ${notifications}
internal: true
on_value:
then:
- lvgl.label.update:
id: notification_current_text
text: !lambda |-
if (x.empty() || x == "unknown" || x == "unavailable") {
return std::string("");
}
return x;
- lambda: |-
auto s = x;
bool valid = !s.empty() && s != "unknown" && s != "unavailable";
id(notification) = valid;
if (valid) {
if (s != id(notification_last_text)) {
id(notification_last_text) = s;
id(notification_last_changed) = id(esptime).now().timestamp;
}
} else {
id(notification_last_text) = "";
id(notification_last_changed) = 0;
}
- lvgl.label.update:
id: notification_time
text: !lambda |-
if (!id(notification) || id(notification_last_changed) == 0) {
return std::string("");
}
const char* dias[] = {
"domingo", "lunes", "martes", "miercoles",
"jueves", "viernes", "sabado"
};
time_t ts = id(notification_last_changed);
struct tm recv_tm = *localtime(&ts);
auto now = id(esptime).now();
struct tm now_tm = *localtime(&now.timestamp);
char buf[70];
if (recv_tm.tm_year == now_tm.tm_year && recv_tm.tm_yday == now_tm.tm_yday) {
snprintf(buf, sizeof(buf),
"Recibida hoy, a las %02d:%02d",
recv_tm.tm_hour, recv_tm.tm_min);
} else {
time_t yesterday_ts = now.timestamp - 86400;
struct tm yesterday_tm = *localtime(&yesterday_ts);
if (recv_tm.tm_year == yesterday_tm.tm_year && recv_tm.tm_yday == yesterday_tm.tm_yday) {
snprintf(buf, sizeof(buf),
"Recibida ayer, a las %02d:%02d",
recv_tm.tm_hour, recv_tm.tm_min);
} else {
snprintf(buf, sizeof(buf),
"Recibida el %s, a las %02d:%02d",
dias[recv_tm.tm_wday],
recv_tm.tm_hour,
recv_tm.tm_min);
}
}
return std::string(buf);
- if:
condition:
lambda: 'return id(notification);'
then:
- lvgl.image.update:
id: animation_widget
src: img_animation_alert
- lvgl.widget.show: alert_icon
else:
- lvgl.image.update:
id: animation_widget
src: img_animation_active
- lvgl.widget.hide: alert_icon
- delay: 1s
- light.turn_on: backlight
- lvgl.resume:
- lvgl.widget.redraw:
## Calendar
## Calendario
- platform: homeassistant
id: calendar_state
entity_id: ${calendar}
internal: true
on_value:
then:
- script.execute: refresh_calendar_widget
- platform: homeassistant
id: calendar_event_name
entity_id: ${calendar}
attribute: message
internal: true
- platform: homeassistant
id: calendar_event_start
entity_id: ${calendar}
attribute: start_time
internal: true
- platform: homeassistant
id: calendar_event_end
entity_id: ${calendar}
attribute: end_time
internal: true
on_value:
then:
- script.execute: refresh_calendar_widget
## Media
## Media
- platform: homeassistant
id: media_status
entity_id: ${media}
internal: true
- platform: homeassistant
id: media_title
entity_id: ${media}
attribute: media_title
internal: true
on_value:
then:
- lvgl.label.update:
id: lbl_home_media_title
text: !lambda |-
if (x.length() > 18)
return (x.substr(0, 15) + "...").c_str();
return x.c_str();
- platform: homeassistant
id: media_artist
entity_id: ${media}
attribute: media_artist
internal: true
on_value:
then:
- lvgl.label.update:
id: lbl_home_media_artist
text: !lambda |-
if (x.length() > 18)
return (x.substr(0, 15) + "...").c_str();
return x.c_str();
## Devices
## Dispositivos
## LIGHTS
- platform: homeassistant
id: device_light_ceiling
entity_id: ${light_ceiling}
internal: true
on_value:
then:
- lvgl.label.update:
id: lbl_device_light_ceiling
text_color: !lambda |-
if (x == "on") {
return lv_color_hex(0xe6d754);
} else {
return lv_color_hex(0x626262);
}
- lvgl.label.update:
id: lbl_menu_light_ceiling_status
text: !lambda |-
if (x == "on") {
return "Encendida";
} else {
return "Apagada";
}
- if:
condition:
lambda: 'return id(device_light_ceiling).state == "on";'
then:
- lvgl.obj.update:
id: lbl_menu_light_ceiling_button
bg_color: 0xadbd53
else:
- lvgl.obj.update:
id: lbl_menu_light_ceiling_button
bg_color: 0x262626
- platform: homeassistant
id: device_light_bar
entity_id: ${light_bar}
internal: true
on_value:
then:
- lvgl.label.update:
id: lbl_menu_light_bar_status
text: !lambda |-
if (x == "on") {
return "Encendida";
} else {
return "Apagada";
}
- if:
condition:
lambda: 'return id(device_light_bar).state == "on";'
then:
- lvgl.obj.update:
id: lbl_menu_light_bar_button
bg_color: 0xadbd53
else:
- lvgl.obj.update:
id: lbl_menu_light_bar_button
bg_color: 0x262626
## COVERS
- platform: homeassistant
id: device_cover1
entity_id: ${cover1}
internal: true
on_value:
then:
- lvgl.label.update:
id: lbl_menu_cover_status
text: !lambda |-
if (id(device_cover1).state == "closed" && id(device_cover2).state == "closed")
return std::string("Cerrados");
return std::string("Abiertos");
- platform: homeassistant
id: device_cover2
entity_id: ${cover2}
internal: true
on_value:
then:
- lvgl.label.update:
id: lbl_menu_cover_status
text: !lambda |-
if (id(device_cover1).state == "closed" && id(device_cover2).state == "closed")
return std::string("Cerrados");
return std::string("Abiertos");
## FAN
- platform: homeassistant
id: device_fan_ceiling
entity_id: ${fan_ceiling}
internal: true
on_value:
then:
- lvgl.label.update:
id: lbl_device_fan
text_color: !lambda |-
if (x == "on") {
return lv_color_hex(0x1EBBD7);
} else {
return lv_color_hex(0x626262);
}
- lvgl.label.update:
id: lbl_menu_fan_ceiling_status
text: !lambda |-
if (x == "on") {
return "Encendido";
} else {
return "Apagado";
}
- if:
condition:
lambda: 'return id(device_fan_ceiling).state == "on";'
then:
- lvgl.obj.update:
id: lbl_menu_fan_ceiling_button
bg_color: 0xadbd53
else:
- lvgl.obj.update:
id: lbl_menu_fan_ceiling_button
bg_color: 0x262626
## CLIMATE
- platform: homeassistant
id: device_climate
entity_id: ${climate}
internal: true
on_value:
then:
- lvgl.label.update:
id: lbl_device_climate
text_color: !lambda |-
if (x == "on") {
return lv_color_hex(0xe0a020);
} else {
return lv_color_hex(0x626262);
}
- lvgl.label.update:
id: lbl_menu_climate_status
text: !lambda |-
if (x == "off") {
return "Apagada";
} else {
return "Encendida";
}
- if:
condition:
lambda: 'return id(device_climate).state == "off";'
then:
- lvgl.obj.update:
id: lbl_menu_climate_button
bg_color: 0x262626
else:
- lvgl.obj.update:
id: lbl_menu_climate_button
bg_color: 0xadbd53
## DEHUMIDIFIER
- platform: homeassistant
id: device_dehumidifier
entity_id: ${dehumidifier}
internal: true
on_value:
then:
- lvgl.label.update:
id: lbl_menu_dehumidifier_status
text: !lambda |-
if (x == "off") {
return "Apagado";
} else {
return "Encendido";
}
- if:
condition:
lambda: 'return id(device_dehumidifier).state == "off";'
then:
- lvgl.obj.update:
id: lbl_menu_dehumidifier_button
bg_color: 0x262626
else:
- lvgl.obj.update:
id: lbl_menu_dehumidifier_button
bg_color: 0xadbd53
## 3D PRINTER
- platform: homeassistant
id: device_printer_3d
entity_id: ${printer_3d}
internal: true
on_value:
then:
- lvgl.image.update:
id: lbl_device_printer_3d
image_recolor: !lambda |-
if (x == "on") {
return lv_color_hex(0xe65476);
} else {
return lv_color_hex(0x626262);
}
- lvgl.label.update:
id: btn_printer_3d_status
text: !lambda |-
if (x == "on") {
return "Encendida";
} else {
return "Apagada";
}
- if:
condition:
lambda: 'return id(device_printer_3d).state == "on";'
then:
- lvgl.obj.update:
id: btn_3dprinter_toggle
bg_color: 0xadbd53
else:
- lvgl.obj.update:
id: btn_3dprinter_toggle
bg_color: 0x262626
- lvgl.label.update:
id: lbl_menu_printer_3d_status
text: !lambda |-
if (x == "on") {
return "Encendida";
} else {
return "Apagada";
}
- if:
condition:
lambda: 'return id(device_printer_3d).state == "on";'
then:
- lvgl.obj.update:
id: lbl_menu_printer_3d_button
bg_color: 0xadbd53
else:
- lvgl.obj.update:
id: lbl_menu_printer_3d_button
bg_color: 0x262626
- platform: homeassistant
id: device_printer_3d_octoprint
entity_id: ${printer_3d_octoprint_status}
internal: true
on_value:
then:
- lvgl.label.update:
id: lbl_device_printer_3d_octoprint_status
text: !lambda |-
if (x == "on") {
return "Octoprint (Online)";
} else {
return "Octoprint (Offline)";
}
text_color: !lambda |-
if (x == "on") {
return lv_color_hex(0xc9e654);
} else {
return lv_color_hex(0x767676);
}
- platform: homeassistant
id: device_printer_3d_octoprint_finish
entity_id: ${printer_3d_octoprint_finish}
internal: true
on_value:
then:
- lvgl.label.update:
id: lbl_device_printer_3d_estimated_time
text: !lambda |-
std::string raw = id(device_printer_3d_octoprint_finish).state;
if (raw.empty() || raw == "unknown" || raw == "unavailable") { return std::string("Ninguna impresión en curso"); }
int year, month, day, hour, minute, second;
sscanf(raw.c_str(), "%d-%d-%dT%d:%d:%d", &year, &month, &day, &hour, &minute, &second);
int days_in_month[] = {31,28,31,30,31,30,31,31,30,31,30,31};
if ((year % 4 == 0 && year % 100 != 0) || year % 400 == 0)
days_in_month[1] = 29;
long days = 0;
for (int y = 1970; y < year; y++) { days += ((y % 4 == 0 && y % 100 != 0) || y % 400 == 0) ? 366 : 365; }
for (int m = 1; m < month; m++) { days += days_in_month[m - 1]; }
days += day - 1;
time_t finish_ts = days * 86400L + hour * 3600L + minute * 60L + second;
time_t now_ts = id(esptime).now().timestamp;
long remaining = (long)finish_ts - (long)now_ts;
if (remaining <= 0) { return std::string("Finalizando..."); }
int hours = remaining / 3600;
int minutes = (remaining % 3600) / 60;
char buffer[30];
if (hours > 0) { snprintf(buffer, sizeof(buffer), "Termina en %dh %02dm", hours, minutes); }
else { snprintf(buffer, sizeof(buffer), "Termina en %dm", minutes); }
return std::string(buffer);
- lvgl.label.update:
id: lbl_home_printer_3d_estimated_time
text: !lambda |-
std::string raw = id(device_printer_3d_octoprint_finish).state;
if (raw.empty() || raw == "unknown" || raw == "unavailable") { return std::string("Ninguna impresión en curso"); }
int year, month, day, hour, minute, second;
sscanf(raw.c_str(), "%d-%d-%dT%d:%d:%d", &year, &month, &day, &hour, &minute, &second);
int days_in_month[] = {31,28,31,30,31,30,31,31,30,31,30,31};
if ((year % 4 == 0 && year % 100 != 0) || year % 400 == 0)
days_in_month[1] = 29;
long days = 0;
for (int y = 1970; y < year; y++) { days += ((y % 4 == 0 && y % 100 != 0) || y % 400 == 0) ? 366 : 365; }
for (int m = 1; m < month; m++) { days += days_in_month[m - 1]; }
days += day - 1;
time_t finish_ts = days * 86400L + hour * 3600L + minute * 60L + second;
time_t now_ts = id(esptime).now().timestamp;
long remaining = (long)finish_ts - (long)now_ts;
if (remaining <= 0) { return std::string("Finalizando..."); }
int hours = remaining / 3600;
int minutes = (remaining % 3600) / 60;
char buffer[30];
if (hours > 0) { snprintf(buffer, sizeof(buffer), "Termina en %dh %02dm", hours, minutes); }
else { snprintf(buffer, sizeof(buffer), "Termina en %dm", minutes); }
return std::string(buffer);
- platform: homeassistant
id: device_printer_3d_octoprint_file
entity_id: ${printer_3d_octoprint_file}
internal: true
on_value:
then:
- lvgl.label.update:
id: lbl_device_printer_3d_octoprint_file
text: !lambda |-
if (x.empty() || x == "unknown" || x == "unavailable") {
return std::string("");
}
if (x.length() > 60) {
return x.substr(0, 57) + "...";
}
return x;
- lvgl.label.update:
id: lbl_home_printer_3d_octoprint_file
text: !lambda |-
if (x.empty() || x == "unknown" || x == "unavailable") {
return std::string("");
}
if (x.length() > 20) {
return x.substr(0, 17) + "...";
}
return x;
# PRINTER
- platform: homeassistant
id: device_printer
entity_id: ${printer}
internal: true
on_value:
then:
- lvgl.label.update:
id: lbl_menu_printer_status
text: !lambda |-
if (x == "on") {
return "Encendida";
} else {
return "Apagada";
}
- if:
condition:
lambda: 'return id(device_printer).state == "on";'
then:
- lvgl.obj.update:
id: lbl_menu_printer_button
bg_color: 0xadbd53
else:
- lvgl.obj.update:
id: lbl_menu_printer_button
bg_color: 0x262626
# VACUUM
- platform: homeassistant
id: device_vacuum
entity_id: ${vacuum}
internal: true
on_value:
then:
- lvgl.label.update:
id: btn_vacuum_status
text: !lambda |-
if (x == "cleaning") {
return "Limpiando";
} else if (x == "paused") {
return "Esperando";
} else {
return "En la base";
}
- lvgl.widget.update:
id: btn_vacuum_toggle
bg_color: !lambda |-
if (x == "cleaning") {
return lv_color_hex(0xadbd53);
} else if (x == "paused") {
return lv_color_hex(0xe0a020);
} else {
return lv_color_hex(0x262626);
}
- lvgl.bar.update:
id: lbl_device_vacuum_progress_bar
indicator:
bg_color: !lambda |-
if (x == "paused") {
return lv_color_hex(0xe0a020);
} else {
return lv_color_hex(0xadbd53);
}
- lvgl.bar.update:
id: lbl_home_vacuum_progress_bar
indicator:
bg_color: !lambda |-
if (x == "paused") {
return lv_color_hex(0xe0a020);
} else {
return lv_color_hex(0xadbd53);
}
- lvgl.label.update:
id: lbl_home_vacuum_current_room
text_color: !lambda |-
if (x == "paused") {
return lv_color_hex(0xe0a020);
} else {
return lv_color_hex(0xadbd53);
}
- lvgl.label.update:
id: lbl_menu_vacuum_status
text: !lambda |-
if (x == "cleaning") {
return "Limpiando";
} else if (x == "paused") {
return "Esperando";
} else {
return "En la base";
}
- lvgl.widget.update:
id: lbl_menu_vacuum_button
bg_color: !lambda |-
if (x == "cleaning") {
return lv_color_hex(0xadbd53);
} else if (x == "paused") {
return lv_color_hex(0xe0a020);
} else {
return lv_color_hex(0x262626);
}
- platform: homeassistant
id: device_vacuum_error
entity_id: ${vacuum_error}
internal: true
on_value:
then:
- lvgl.label.update:
id: lbl_device_vacuum_error
text_color: !lambda |-
if (x == "none") {
return lv_color_hex(0x767676);
} else {
return lv_color_hex(0xe65470);
}
- lvgl.image.update:
id: icon_vacuum_error_state
image_recolor: !lambda |-
if (x == "none") {
return lv_color_hex(0x767676);
} else {
return lv_color_hex(0xe65470);
}
- platform: homeassistant
id: device_vacuum_current_room
entity_id: ${vacuum_current_room}
internal: true
on_value:
then:
- lvgl.label.update:
id: lbl_device_vacuum_current_room
text: !lambda |-
if (x.empty() || x == "unknown" || x == "unavailable") {
return std::string("Me he perdido");
}
return std::string("Ahora en ") + x;
- lvgl.label.update:
id: lbl_home_vacuum_current_room
text: !lambda |-
if (x.empty() || x == "unknown" || x == "unavailable") {
return std::string("Me he perdido");
}
return std::string("Ahora en ") + x;
- platform: homeassistant
id: device_vacuum_last_clean
entity_id: ${vacuum_last_clean}
internal: true
on_value:
then:
- lvgl.label.update:
id: lbl_device_vacuum_last_clean
text: !lambda |-
std::string raw = x;
if (raw.empty() || raw == "unknown" || raw == "unavailable") {
return std::string("Última limpieza: --");
}
int year, month, day, hour, minute, second;
sscanf(raw.c_str(), "%d-%d-%dT%d:%d:%d", &year, &month, &day, &hour, &minute, &second);
int days_in_month[] = {31,28,31,30,31,30,31,31,30,31,30,31};
if ((year % 4 == 0 && year % 100 != 0) || year % 400 == 0)
days_in_month[1] = 29;
long days = 0;
for (int y = 1970; y < year; y++) {
days += ((y % 4 == 0 && y % 100 != 0) || y % 400 == 0) ? 366 : 365;
}
for (int m = 1; m < month; m++) {
days += days_in_month[m - 1];
}
days += day - 1;
time_t clean_ts = days * 86400L + hour * 3600L + minute * 60L + second;
time_t now_ts = id(esptime).now().timestamp;
long elapsed = (long)now_ts - (long)clean_ts;
if (elapsed < 0) return std::string("Última limpieza: --");
int hours = elapsed / 3600;
int minutes = (elapsed % 3600) / 60;
char buffer[40];
if (hours >= 24) {
int days_ago = hours / 24;
snprintf(buffer, sizeof(buffer), "Última limpieza hace %d día%s", days_ago, days_ago > 1 ? "s" : "");
} else if (hours > 0) {
snprintf(buffer, sizeof(buffer), "Última limpieza hace %dh %02dm", hours, minutes);
} else {
snprintf(buffer, sizeof(buffer), "Última limpieza hace %dm", minutes);
}
return std::string(buffer);
speaker:
- platform: i2s_audio
id: tab5_speaker
i2s_audio_id: mic_bus
i2s_dout_pin: GPIO26
audio_dac: es8388_dac
dac_type: external
channel: mono
buffer_duration: 100ms
bits_per_sample: 16bit
sample_rate: 48000
time:
- platform: homeassistant
id: esptime
on_time:
- seconds: 0
minutes: 0
hours: 0
then:
- lvgl.label.update:
id: lbl_date
text: !lambda |-
auto now = id(esptime).now();
const char* dias[] = {"", "Domingo", "Lunes", "Martes", "Miercoles", "Jueves", "Viernes", "Sabado"};
char buf[30];
snprintf(buf, sizeof(buf), "%s, %02d/%02d/%02d",
dias[now.day_of_week],
now.day_of_month,
now.month,
now.year % 100);
return std::string(buf);
on_time_sync:
then:
- lvgl.label.update:
id: lbl_date
text: !lambda |-
auto now = id(esptime).now();
const char* dias[] = {"", "Domingo", "Lunes", "Martes", "Miercoles", "Jueves", "Viernes", "Sabado"};
char buf[30];
snprintf(buf, sizeof(buf), "%s, %02d/%02d/%02d",
dias[now.day_of_week],
now.day_of_month,
now.month,
now.year % 100);
return std::string(buf);
- lvgl.label.update:
id: lbl_clock
text: !lambda 'return id(esptime).now().strftime("%H:%M");'
touchscreen:
- platform: gt911
interrupt_pin: GPIO23
update_interval: never
reset_pin:
pi4ioe5v6408: pi4ioe1
number: 5
calibration:
x_min: 0
x_max: 720
y_min: 0
y_max: 1280
id: touch
on_release:
then:
- if:
condition: lvgl.is_paused
then:
- lvgl.page.show: page_home
- light.turn_on: backlight
- lvgl.resume:
- lvgl.widget.redraw:
voice_assistant:
id: va
microphone: tab5_microphone
media_player: speaker_player
micro_wake_word: mww
on_stt_end:
- lvgl.image.update:
id: lbl_assist_icon
src: icon_assist_thinking
- lvgl.label.update:
id: lbl_assist_command
text: !lambda 'return x;'
- lvgl.label.update:
id: lbl_assist_awake
text: "..."
on_tts_start:
- lvgl.image.update:
id: lbl_assist_icon
src: icon_assist_success
# - lvgl.label.update:
# id: lbl_assist_awake
# text: !lambda 'return x;'
- lvgl.label.update:
id: lbl_assist_awake
text: !lambda |-
std::string s = x;
if (!s.empty()) {
s[0] = static_cast<char>(std::toupper(static_cast<unsigned char>(s[0])));
}
return s;
on_end:
- light.turn_on: backlight
- lvgl.resume:
- lvgl.widget.redraw:
# Wait a short amount of time to see if an announcement starts
- wait_until:
condition:
- media_player.is_announcing:
timeout: 0.5s
# Announcement is finished and the I2S bus is free
- wait_until:
- and:
- not:
media_player.is_announcing:
- not:
speaker.is_playing:
- delay: 5s
- micro_wake_word.start:
- lvgl.image.update:
id: lbl_assist_icon
src: icon_assist_active
- lvgl.label.update:
id: lbl_assist_command
text: ""
- lvgl.label.update:
id: lbl_assist_awake
text: "Te escucho..."
- lvgl.page.show: page_home
on_client_connected:
- micro_wake_word.start:
on_client_disconnected:
- micro_wake_word.stop:
display:
- platform: mipi_dsi
dimensions:
height: 1280
width: 720
model: M5Stack-Tab5
reset_pin:
pi4ioe5v6408: pi4ioe1
number: 4
color_order: rgb
lvgl:
color_depth: 16
buffer_size: 100%
byte_order: little_endian
rotation: 90
on_idle:
- timeout: ${iddle_time}
then:
- lvgl.pause:
- light.turn_off:
id: backlight
style_definitions:
## Quick Access Devices
## Acceso Rápido Dispositivos
- id: quick_access_device_1
width: 145
height: 145
bg_color: 0x000000
bg_opa: 0%
border_color: 0x000000
border_opa: 0%
border_width: 0
align: BOTTOM_RIGHT
pad_all: 0
translate_x: -595
translate_y: -13
- id: quick_access_device_2
width: 145
height: 145
bg_color: 0x000000
bg_opa: 0%
border_color: 0x000000
border_opa: 0%
border_width: 0
align: BOTTOM_RIGHT
pad_all: 0
translate_x: -445
translate_y: -13
- id: quick_access_device_3
width: 145
height: 145
bg_color: 0x000000
bg_opa: 0%
border_color: 0x000000
border_opa: 0%
border_width: 0
align: BOTTOM_RIGHT
pad_all: 0
translate_x: -285
translate_y: 8
- id: quick_access_device_4
width: 145
height: 145
bg_color: 0x000000
bg_opa: 0%
border_color: 0x000000
border_opa: 0%
border_width: 0
align: BOTTOM_RIGHT
pad_all: 0
translate_x: -160
translate_y: -13
- id: button_menu
width: 145
height: 145
bg_color: 0x000000
bg_opa: 0%
border_color: 0x000000
border_opa: 0%
border_width: 0
align: BOTTOM_RIGHT
pad_all: 0
translate_x: 0
translate_y: -10
- id: button_more
width: 100
height: 100
bg_color: 0x000000
bg_opa: 0%
border_color: 0x000000
border_opa: 0%
border_width: 0
align: TOP_RIGHT
pad_all: 0
translate_x: -10
translate_y: 20
- id: button_back
width: 100
height: 100
bg_color: 0x000000
bg_opa: 0%
border_color: 0x000000
border_opa: 0%
border_width: 0
align: BOTTOM_RIGHT
pad_all: 0
translate_x: -10
translate_y: -10
## Device details
## Detalle de dispositivos
- id: device_status
align: TOP_LEFT
text_font: font_device_status
- id: device_status_bottom
align: BOTTOM_LEFT
text_font: font_device_status
- id: style_button
width: 300
height: 160
bg_color: 0x262626
border_width: 0
- id: style_button_secondary
width: 150
height: 160
bg_color: 0x262626
border_width: 0
pad_all: 0
- id: style_button_text
align: CENTER
text_font: font_device_name
text_color: 0xffffff
- id: style_button_status
align: CENTER
text_font: font_values
text_color: 0x525252
## Cover page
## Página de persianas
- id: slider_front_cover
width: 300
height: 400
bg_color: 0xc0e8ef
radius: 0
align: CENTER
- id: slider_back_cover
width: 300
height: 400
bg_color: 0x85b3bb
bg_opa: COVER
radius: 20
align: CENTER
- id: slider_label_values_cover
align: CENTER
text_font: font_value
text_color: 0x426970
## Progress Bar
## Barra de progreso
- id: style_bar_progress
radius: 10
bg_color: 0x262626
bg_opa: COVER
- id: progress_bar_label_values
align: CENTER
text_font: font_value
text_color: 0xffffff
- id: progress_bar_label_estimated_time
align: RIGHT_MID
text_font: font_values
text_color: 0x525252
## Media Widget
## Widget multimedia
- id: style_home_media_title
align: LEFT_MID
text_font: font_values
text_color: 0xffffff
- id: style_home_media_artist
align: LEFT_MID
text_font: font_values
text_color: 0x525252
- id: style_home_media_track
align: RIGHT_MID
text_font: font_values
text_color: 0x525252
pages:
## Home page
## Página de inicio
- id: page_home
bg_color: ${background_color}
scrollbar_mode: "OFF"
scroll_snap_x: none
scroll_dir: NONE
widgets:
## LEFT SIDE (Date, time and device info)
## LADO IZQUIERDO (Fecha, hora e información del dispositivo)
- label:
id: weather_icon
align: TOP_LEFT
text_font: font_top_icons
text_color: 0xe6b454
text: "\U0000e81a" # SUN
pad_top: 10
pad_left: 70
- label:
align: TOP_LEFT
id: lbl_date
text: "Lunes, 00/00/00"
text_color: ${text_color_secondary}
text_font: font_info_text
pad_top: 25
pad_left: 160
- label:
align: TOP_LEFT
id: lbl_clock
text: "00:00"
text_color: ${text_color}
text_font: font_clock
pad_left: 55
pad_top: 80
- image:
id: animation_widget
align: TOP_LEFT
src: img_animation_active
pad_left: 80
pad_top: 365
on_press:
then:
- if:
condition:
lambda: 'return id(notification);'
then:
- lvgl.page.show: page_notification
- label:
id: thermometer_icon
align: BOTTOM_LEFT
text_font: font_info_icons_little
text_color: ${text_color_secondary}
text: "\U0000e1ff"
y: -60
pad_left: 65
- label:
align: BOTTOM_LEFT
id: lbl_room_temperature
text: "20ºC"
text_color: ${text_color_secondary}
text_font: font_info_text
y: -60
pad_left: 110
- label:
id: humidity_icon
align: BOTTOM_LEFT
text_font: font_info_icons_little
text_color: ${text_color_secondary}
text: "\U0000f87e"
y: -60
pad_left: 200
- label:
align: BOTTOM_LEFT
id: lbl_room_humidity
text: "40%"
text_color: ${text_color_secondary}
text_font: font_info_text
y: -60
pad_left: 255
- label:
id: co2_icon
align: BOTTOM_LEFT
text_font: font_info_icons_little
text_color: ${text_color_secondary}
text: "\U0000e29c"
y: -60
pad_left: 335
- label:
align: BOTTOM_LEFT
id: lbl_room_co2
text: "OK"
text_color: ${text_color_secondary}
text_font: font_info_text
y: -60
pad_left: 380
## TOP BAR (WiFi, speaker and battery)
## BARRA SUPERIOR (WiFi, altavoz y batería)
- label:
id: alert_icon
align: TOP_RIGHT
text_font: font_info_icons_little
text_color: 0xdc424d
text: "\U0000f654"
pad_top: 15
pad_right: 343
hidden: true
on_press:
then:
lvgl.page.show: page_notification
- label:
id: wifi_icon
align: TOP_RIGHT
text_font: font_info_icons_little
text_color: ${text_color_secondary}
text: "\U0000e648"
pad_top: 15
pad_right: 273
- label:
id: speaker_icon
align: TOP_RIGHT
text_font: font_info_icons
text_color: ${text_color_secondary}
text: "\U0000e98e"
pad_top: 17
pad_right: 203
clickable: true
on_click:
then:
- switch.toggle: speaker_enable
- label:
id: battery_icon
align: TOP_RIGHT
text_font: font_info_icons
text_color: ${text_color_secondary}
text: "\U0000f24f"
pad_top: 17
pad_right: 133
- label:
align: TOP_RIGHT
id: lbl_battery_percentage
text: "100%"
text_color: ${text_color_secondary}
text_font: font_info_text
pad_top: 17
pad_right: 35
## CALENDAR
## CALENDARIO
- obj:
id: widget_calendar
x: 555
y: 110
width: 690
height: 150
bg_opa: TRANSP
border_width: 0
pad_all: 0
widgets:
- bar:
id: lbl_home_calendar_progress_bar
styles: style_bar_progress
min_value: 0
max_value: 100
clickable: false
value: 50
width: 690
height: 125
indicator:
bg_color: 0x1ebbd7
bg_opa: COVER
radius: 10
- image:
id: icon_calendar_mini_id
src: icon_calendar_mini
image_recolor: 0xffffff
image_recolor_opa: COVER
align: LEFT_MID
x: 25
y: -10
- label:
styles: style_home_media_title
id: lbl_home_calendar_event_name
x: 110
y: -30
text: "Charla de Aguacatec"
text_color: 0xffffff
- label:
styles: style_home_media_artist
id: lbl_home_calendar_event_details
x: 110
y: 10
text: "26/04/26, de 11:00 a 12:00"
text_color: 0xffffff
text_opa: 50%
## MEDIA CONTROL
## CONTROL MULTIMEDIA
- obj:
id: widget_media
x: 555
y: 255
width: 690
height: 150
bg_opa: TRANSP
border_width: 0
pad_all: 0
widgets:
- bar:
id: lbl_home_media_progress_bar
styles: style_bar_progress
min_value: 0
max_value: 100
clickable: false
value: 0
width: 690
height: 125
indicator:
bg_color: 0x1ed760
bg_opa: COVER
radius: 10
- image:
src: icon_music_mini
image_recolor: 0xffffff
image_recolor_opa: COVER
align: LEFT_MID
x: 25
y: -13
- label:
styles: style_home_media_title
id: lbl_home_media_title
x: 110
y: -30
text: "Héroes del Sábado"
text_color: 0xffffff
- label:
styles: style_home_media_artist
id: lbl_home_media_artist
x: 110
y: 10
text: "La M.O.D.A."
text_color: 0xffffff
text_opa: 50%
- image:
src: icon_music_previous
image_recolor: 0xffffff
image_recolor_opa: COVER
align: RIGHT_MID
x: -220
y: -10
on_press:
then:
- homeassistant.action:
service: media_player.media_previous_track
data:
entity_id: ${media}
- image:
src: icon_music_toggle
image_recolor: 0xffffff
image_recolor_opa: COVER
align: RIGHT_MID
x: -120
y: -10
on_press:
then:
- homeassistant.action:
service: media_player.media_play_pause
data:
entity_id: ${media}
- image:
src: icon_music_next
image_recolor: 0xffffff
image_recolor_opa: COVER
align: RIGHT_MID
x: -20
y: -10
on_press:
then:
- homeassistant.action:
service: media_player.media_next_track
data:
entity_id: ${media}
## PROGRESS BAR
## BARRA DE PROGRESO
## GOAL
- obj:
id: widget_progress_goal
x: 555
y: 400
width: 690
height: 150
bg_opa: TRANSP
border_width: 0
pad_all: 0
widgets:
- bar:
id: lbl_home_goal_progress_bar
styles: style_bar_progress
min_value: 0
max_value: ${goal_target}
clickable: false
value: 0
width: 690
height: 125
indicator:
bg_color: 0xbd535d
bg_opa: COVER
radius: 10
- image:
src: icon_youtube_mini
image_recolor: 0xffffff
image_recolor_opa: COVER
align: LEFT_MID
x: 25
y: -13
- label:
id: lbl_home_goal_progress_value
styles: progress_bar_label_values
align: LEFT_MID
x: 110
y: -15
text: "0%"
- label:
styles: progress_bar_label_estimated_time
id: lbl_home_goal_current
x: -30
y: -30
text: "3000 Suscriptores"
text_color: 0xffffff
- label:
styles: progress_bar_label_estimated_time
x: -30
y: 10
text: ${goal_text}
text_color: 0xffffff
text_opa: 50%
## 3D PRINTING
- obj:
id: widget_progress_3dprinter
x: 555
y: 400
width: 690
height: 150
bg_opa: TRANSP
border_width: 0
pad_all: 0
hidden: true
on_press:
then:
- lvgl.page.show: page_3dprinter
widgets:
- bar:
id: lbl_home_printer_3d_progress_bar
styles: style_bar_progress
min_value: 0
max_value: 100
clickable: false
value: 0
width: 690
height: 125
indicator:
bg_color: 0xadbd53
bg_opa: COVER
radius: 10
- image:
src: icon_3dprinter_mini
image_recolor: 0xffffff
image_recolor_opa: COVER
align: LEFT_MID
x: 25
y: -13
- label:
id: lbl_home_printer_3d_progress_value
styles: progress_bar_label_values
align: LEFT_MID
x: 110
y: -15
text: "0%"
- label:
styles: progress_bar_label_estimated_time
id: lbl_home_printer_3d_octoprint_file
x: -30
y: -30
text: ""
text_color: 0xc9e654
- label:
id: lbl_home_printer_3d_estimated_time
styles: progress_bar_label_estimated_time
x: -30
y: 10
text: "Ninguna impresión en curso"
## VACUUM CLEANING
- obj:
id: widget_progress_vacuum
x: 555
y: 400
width: 690
height: 150
bg_opa: TRANSP
border_width: 0
pad_all: 0
hidden: true
on_press:
then:
- lvgl.page.show: page_vacuum
widgets:
- bar:
id: lbl_home_vacuum_progress_bar
styles: style_bar_progress
min_value: 0
max_value: 100
clickable: false
value: 0
width: 690
height: 125
indicator:
bg_color: 0xadbd53
bg_opa: COVER
radius: 10
- image:
src: icon_vacuum_mini
image_recolor: 0xffffff
image_recolor_opa: COVER
align: LEFT_MID
x: 25
y: -13
- label:
id: lbl_home_vacuum_progress_value
styles: progress_bar_label_values
align: LEFT_MID
x: 110
y: -15
text: "0%"
- label:
id: lbl_home_vacuum_current_room
styles: progress_bar_label_estimated_time
x: -30
y: -30
text: ""
text_color: 0xffffff
- label:
id: lbl_home_vacuum_cleaning_time
styles: progress_bar_label_estimated_time
x: -30
y: 10
text: "Ninguna limpieza en curso"
## BOTTOM BAR (Quick Access Devices)
## BARRA INFERIOR (Acceso Rápido Dispositivos)
- obj:
styles: quick_access_device_1
widgets:
- label:
id: lbl_device_light_ceiling
text_font: font_device_icons
text_color: ${text_color_secondary}
text: "\U0000f02a"
on_press:
then:
- homeassistant.action:
service: light.toggle
data:
entity_id: ${light_ceiling}
- obj:
styles: quick_access_device_2
widgets:
- label:
id: lbl_device_cover
text_font: font_device_icons
text_color: ${text_color_secondary}
text: "\U0000ec12"
on_press:
then:
lvgl.page.show: page_cover
- obj:
styles: quick_access_device_3
widgets:
- image:
id: lbl_device_printer_3d
src: icon_3dprinter
image_recolor: ${text_color_secondary}
image_recolor_opa: COVER
on_press:
then:
lvgl.page.show: page_3dprinter
- obj:
id: btn_climate
styles: quick_access_device_4
hidden: false
widgets:
- label:
id: lbl_device_climate
text_font: font_device_icons
text_color: ${text_color_secondary}
text: "\U0000ef55"
on_press:
then:
- homeassistant.action:
service: climate.toggle
data:
entity_id: ${climate}
- obj:
id: btn_fan
styles: quick_access_device_4
hidden: true
widgets:
- label:
id: lbl_device_fan
text_font: font_device_icons
text_color: ${text_color_secondary}
text: "\U0000f168"
on_press:
then:
- homeassistant.action:
service: fan.toggle
data:
entity_id: ${fan_ceiling}
- image:
id: icon_ha_widget
align: BOTTOM_RIGHT
src: img_icon_ha
pad_right: 85
pad_bottom: 78
on_press:
then:
lvgl.page.show: page_devices_1
## Devices menu page
## Página de menú de dispositivos
- id: page_devices_1
bg_color: ${background_color}
scrollbar_mode: "OFF"
scroll_snap_x: none
scroll_dir: NONE
widgets:
- obj:
layout:
type: GRID
grid_columns: [FR(1), FR(1), FR(1)]
grid_rows: [FR(1), FR(1), FR(1)]
align: CENTER
width: 960
height: 540
bg_opa: TRANSP
border_width: 0
pad_all: 10
widgets:
- obj:
id: lbl_menu_light_ceiling_button
grid_cell_column_pos: 0
grid_cell_row_pos: 0
grid_cell_x_align: CENTER
grid_cell_y_align: CENTER
styles: style_button
widgets:
- label:
styles: style_button_text
text: "Lámpara"
y: -20
- label:
id: lbl_menu_light_ceiling_status
styles: style_button_status
text: "Apagada"
y: 20
on_press:
then:
- homeassistant.action:
service: light.toggle
data:
entity_id: ${light_ceiling}
- obj:
grid_cell_column_pos: 1
grid_cell_row_pos: 0
grid_cell_x_align: CENTER
grid_cell_y_align: CENTER
styles: style_button
widgets:
- label:
styles: style_button_text
text: "Estores"
y: -20
- label:
id: lbl_menu_cover_status
styles: style_button_status
text: "Cerrados"
y: 20
on_press:
then:
lvgl.page.show: page_cover
- obj:
id: lbl_menu_light_bar_button
grid_cell_column_pos: 2
grid_cell_row_pos: 0
grid_cell_x_align: CENTER
grid_cell_y_align: CENTER
styles: style_button
widgets:
- label:
styles: style_button_text
text: "Iluminación"
y: -20
- label:
id: lbl_menu_light_bar_status
styles: style_button_status
text: "Apagada"
y: 20
on_press:
then:
- homeassistant.action:
service: switch.toggle
data:
entity_id: ${light_bar}
- obj:
id: lbl_menu_fan_ceiling_button
grid_cell_column_pos: 0
grid_cell_row_pos: 1
grid_cell_x_align: CENTER
grid_cell_y_align: CENTER
styles: style_button
widgets:
- label:
styles: style_button_text
text: "Ventilador"
y: -20
- label:
id: lbl_menu_fan_ceiling_status
styles: style_button_status
text: "Apagado"
y: 20
on_press:
then:
- homeassistant.action:
service: fan.toggle
data:
entity_id: ${fan_ceiling}
- obj:
id: lbl_menu_climate_button
grid_cell_column_pos: 1
grid_cell_row_pos: 1
grid_cell_x_align: CENTER
grid_cell_y_align: CENTER
styles: style_button
widgets:
- label:
styles: style_button_text
text: "Calefacción"
y: -20
- label:
id: lbl_menu_climate_status
styles: style_button_status
text: "Apagada"
y: 20
on_press:
then:
- homeassistant.action:
service: climate.toggle
data:
entity_id: ${climate}
- obj:
id: lbl_menu_dehumidifier_button
grid_cell_column_pos: 2
grid_cell_row_pos: 1
grid_cell_x_align: CENTER
grid_cell_y_align: CENTER
styles: style_button
widgets:
- label:
styles: style_button_text
text: "Deshumidif."
y: -20
- label:
id: lbl_menu_dehumidifier_status
styles: style_button_status
text: "Apagado"
y: 20
on_press:
then:
- homeassistant.action:
service: humidifier.toggle
data:
entity_id: ${dehumidifier}
- obj:
id: lbl_menu_printer_3d_button
grid_cell_column_pos: 0
grid_cell_row_pos: 2
grid_cell_x_align: CENTER
grid_cell_y_align: CENTER
styles: style_button
widgets:
- label:
styles: style_button_text
text: "Impresora 3D"
y: -20
- label:
id: lbl_menu_printer_3d_status
styles: style_button_status
text: "Apagada"
y: 20
on_press:
then:
lvgl.page.show: page_3dprinter
- obj:
id: lbl_menu_vacuum_button
grid_cell_column_pos: 1
grid_cell_row_pos: 2
grid_cell_x_align: CENTER
grid_cell_y_align: CENTER
styles: style_button
widgets:
- label:
styles: style_button_text
text: "Aspirador"
y: -20
- label:
id: lbl_menu_vacuum_status
styles: style_button_status
text: "En la base"
y: 20
on_press:
then:
lvgl.page.show: page_vacuum
- obj:
id: lbl_menu_printer_button
grid_cell_column_pos: 2
grid_cell_row_pos: 2
grid_cell_x_align: CENTER
grid_cell_y_align: CENTER
styles: style_button
widgets:
- label:
styles: style_button_text
text: "Impresora"
y: -20
- label:
id: lbl_menu_printer_status
styles: style_button_status
text: "Apagada"
y: 20
on_press:
then:
- homeassistant.action:
service: switch.toggle
data:
entity_id: ${printer}
- obj:
styles: button_more
on_press:
then:
lvgl.page.show: page_devices_1
widgets:
- label:
text_font: font_device_icons_little
text_color: ${text_color_secondary}
text: "\U0000e548"
- obj:
styles: button_back
on_press:
then:
lvgl.page.show: page_home
widgets:
- label:
text_font: font_device_icons_little
text_color: ${text_color_secondary}
text: "\U0000e879"
## Cover page
## Página de persianas
- id: page_cover
bg_color: ${background_color}
scrollbar_mode: "OFF"
scroll_snap_x: none
scroll_dir: NONE
widgets:
- slider:
styles: slider_back_cover
id: slider_cover_1
x: -200
indicator:
styles: slider_front_cover
knob:
opa: 0
min_value: 0
max_value: 100
on_release:
- homeassistant.action:
action: cover.set_cover_position
data:
entity_id: ${cover1}
position: !lambda return int(x);
- label:
styles: slider_label_values_cover
id: slider_cover_1_value
x: -200
text: "0%"
- label:
text_font: font_details_icons
text_color: 0xffffff
text: "\U0000e286"
align: TOP_MID
y: 180
x: -200
- label:
text_font: font_details_icons
text_color: 0x608c94
text: "\U0000ec1f"
align: BOTTOM_MID
y: -180
x: -200
- slider:
styles: slider_back_cover
id: slider_cover_2
x: 200
indicator:
styles: slider_front_cover
knob:
opa: 0
min_value: 0
max_value: 100
on_release:
- homeassistant.action:
action: cover.set_cover_position
data:
entity_id: ${cover2}
position: !lambda return int(x);
- label:
styles: slider_label_values_cover
id: slider_cover_2_value
x: 200
text: "0%"
- label:
text_font: font_details_icons
text_color: 0xffffff
text: "\U0000e286"
align: TOP_MID
y: 180
x: 200
- label:
text_font: font_details_icons
text_color: 0x608c94
text: "\U0000ec1f"
align: BOTTOM_MID
y: -180
x: 200
- obj:
styles: button_back
on_press:
then:
lvgl.page.show: page_home
widgets:
- label:
text_font: font_device_icons_little
text_color: ${text_color_secondary}
text: "\U0000e879"
## 3D Printer page
## Página de Impresora 3D
- id: page_3dprinter
bg_color: ${background_color}
scrollbar_mode: "OFF"
scroll_snap_x: none
scroll_dir: NONE
widgets:
- label:
styles: device_status
id: lbl_device_printer_3d_octoprint_status
x: 90
y: 100
text: "Octoprint (Offline)"
text_color: ${text_color_secondary}
- label:
styles: device_status
align: TOP_RIGHT
id: lbl_device_printer_3d_octoprint_temp_bed
x: -120
y: 90
text: "Tª Cama 0ºC"
text_color: ${text_color_secondary}
- image:
src: icon_3dprinter_bed
image_recolor: ${text_color_secondary}
image_recolor_opa: COVER
align: TOP_RIGHT
x: -70
y: 95
- label:
styles: device_status
align: TOP_RIGHT
id: lbl_device_printer_3d_octoprint_temp_hotend
x: -120
y: 140
text: "Tª Extrusor 0ºC"
text_color: ${text_color_secondary}
- image:
src: icon_3dprinter_hotend
image_recolor: ${text_color_secondary}
image_recolor_opa: COVER
align: TOP_RIGHT
x: -70
y: 145
- image:
align: LEFT_MID
src: img_3dprinter
pad_left: -80
- obj:
styles: style_button
id: btn_3dprinter_toggle
x: 410
y: 215
widgets:
- label:
styles: style_button_text
align: center
text: "Impresora 3D"
y: -20
- label:
styles: style_button_status
id: btn_printer_3d_status
align: center
text: "Apagada"
y: 20
on_press:
- homeassistant.action:
action: switch.toggle
data:
entity_id: ${printer_3d}
- obj:
styles: style_button_secondary
x: 730
y: 215
widgets:
- label:
text_font: font_device_icons
text_color: ${text_color_secondary}
align: center
text: "\U0000e1a2" # pause
y: 3
on_press:
then:
- homeassistant.action:
action: button.press
data:
entity_id: ${printer_3d_pause_button}
- obj:
styles: style_button_secondary
x: 900
y: 215
widgets:
- label:
text_font: font_device_icons
text_color: ${text_color_secondary}
align: center
text: "\U0000e1c4" # play
y: 3
on_press:
then:
- homeassistant.action:
action: button.press
data:
entity_id: ${printer_3d_resume_button}
- obj:
styles: style_button_secondary
x: 1070
y: 215
widgets:
- label:
text_font: font_device_icons
text_color: ${text_color_secondary}
align: center
text: "\U0000ef71" # stop
y: 3
on_press:
then:
- homeassistant.action:
action: button.press
data:
entity_id: ${printer_3d_stop_button}
- bar:
id: lbl_device_printer_3d_progress_bar
styles: style_bar_progress
min_value: 0
max_value: 100
value: 0
x: 410
y: 395
width: 810
height: 160
indicator:
bg_color: 0xadbd53
bg_opa: COVER
radius: 10
- label:
id: lbl_device_printer_3d_progress_value
styles: progress_bar_label_values
x: -150
y: 112
text: "0%"
- label:
id: lbl_device_printer_3d_estimated_time
styles: progress_bar_label_estimated_time
x: -100
y: 112
text: "Ninguna impresión en curso"
- label:
styles: device_status_bottom
id: lbl_device_printer_3d_octoprint_file
x: 65
y: -50
text: ""
text_color: 0xc9e654
- obj:
styles: button_back
on_press:
then:
lvgl.page.show: page_home
widgets:
- label:
text_font: font_device_icons_little
text_color: ${text_color_secondary}
text: "\U0000e879"
## Vacuum page
## Página de robot aspirador
- id: page_vacuum
bg_color: ${background_color}
scrollbar_mode: "OFF"
scroll_snap_x: none
scroll_dir: NONE
widgets:
- label:
styles: device_status
id: lbl_device_vacuum_current_room
x: 90
y: 100
text: "Ahora en Salón"
text_color: ${text_color_secondary}
- label:
styles: device_status
align: TOP_RIGHT
id: lbl_device_vacuum_water
x: -120
y: 90
text: "Depósito de agua"
text_color: ${text_color_secondary}
- image:
id: icon_vacuum_water_state
src: icon_vacuum_water
image_recolor: ${text_color_secondary}
image_recolor_opa: COVER
align: TOP_RIGHT
x: -70
y: 95
- label:
styles: device_status
align: TOP_RIGHT
id: lbl_device_vacuum_error
x: -120
y: 140
text: "Error en el robot"
text_color: ${text_color_secondary}
- image:
id: icon_vacuum_error_state
src: icon_vacuum_error
image_recolor: ${text_color_secondary}
image_recolor_opa: COVER
align: TOP_RIGHT
x: -70
y: 145
- image:
align: LEFT_MID
src: img_vacuum
pad_left: -20
- obj:
styles: style_button
id: btn_vacuum_toggle
x: 410
y: 215
widgets:
- label:
styles: style_button_text
align: center
text: "Aspirador"
y: -20
- label:
styles: style_button_status
id: btn_vacuum_status
align: center
text: "En la base"
y: 20
- obj:
styles: style_button_secondary
x: 730
y: 215
widgets:
- label:
text_font: font_device_icons
text_color: ${text_color_secondary}
align: center
text: "\U0000e1a2" # pause
y: 3
on_press:
then:
- homeassistant.action:
service: vacuum.pause
data:
entity_id: ${vacuum}
- obj:
styles: style_button_secondary
x: 900
y: 215
widgets:
- label:
text_font: font_device_icons
text_color: ${text_color_secondary}
align: center
text: "\U0000e1c4" # play
y: 3
on_press:
then:
- homeassistant.action:
service: vacuum.start
data:
entity_id: ${vacuum}
- obj:
styles: style_button_secondary
x: 1070
y: 215
widgets:
- label:
text_font: font_device_icons
text_color: ${text_color_secondary}
align: center
text: "\U0000eaaa" # base
y: 3
on_press:
then:
- homeassistant.action:
service: vacuum.return_to_base
data:
entity_id: ${vacuum}
- bar:
id: lbl_device_vacuum_progress_bar
styles: style_bar_progress
min_value: 0
max_value: 100
value: 0
x: 410
y: 395
width: 810
height: 160
indicator:
bg_color: 0xadbd53
bg_opa: COVER
radius: 10
- label:
id: lbl_device_vacuum_progress_value
styles: progress_bar_label_values
x: -150
y: 112
text: "0%"
- label:
id: lbl_device_vacuum_cleaning_time
styles: progress_bar_label_estimated_time
x: -100
y: 112
text: "Ninguna limpieza en curso"
- label:
styles: device_status_bottom
id: lbl_device_vacuum_last_clean
x: 65
y: -50
text: ""
text_color: ${text_color_secondary}
- obj:
styles: button_back
on_press:
then:
lvgl.page.show: page_home
widgets:
- label:
text_font: font_device_icons_little
text_color: ${text_color_secondary}
text: "\U0000e879"
## Notification page
## Página de notificaciones
- id: page_notification
bg_color: 0xdc424d
scrollbar_mode: "OFF"
scroll_snap_x: none
scroll_dir: NONE
widgets:
- label:
align: TOP_LEFT
text_font: font_info_icons_little
text_color: 0xffffff
text: "\U0000f654"
pad_left: 50
pad_top: 32
- label:
align: TOP_LEFT
text: "Notificación pendiente"
text_font: font_device_name
text_color: 0xffffff
pad_left: 100
pad_top: 30
- obj:
styles: button_more
on_press:
then:
- lvgl.page.show: page_home
widgets:
- label:
text_font: font_device_icons_little
text_color: 0xffffff
text: "\U0000e879"
- obj:
align: CENTER
width: 1200
height: 550
radius: 36
bg_color: 0x1f1f1f
bg_opa: 50%
border_width: 0
y: 40
widgets:
- image:
align: TOP_MID
pad_top: 80
src: icon_notification
image_recolor: 0xffffff
image_recolor_opa: COVER
opa: 10%
- image:
align: BOTTOM_LEFT
src: icon_calendar_mini
image_recolor: 0xffffff
image_recolor_opa: COVER
opa: 50%
pad_left: 30
pad_bottom: 10
- label:
id: notification_time
align: BOTTOM_LEFT
text: "Recibida el 27/04, a las 16:00"
text_font: font_device_name
text_color: 0xffffff
text_opa: 80%
pad_left: 90
pad_bottom: 10
- label:
id: notification_current_text
width: 1000
align: CENTER
text_align: CENTER
long_mode: WRAP
text_font: font_notification
text_color: 0xffffff
text: "Esto es una notificación"
pad_top: -20
- label:
align: BOTTOM_RIGHT
pad_right: 80
pad_bottom: 10
text: "Descartar"
text_font: font_device_name
text_color: 0xffffff
text_opa: 80%
on_press:
then:
- homeassistant.action:
service: input_text.set_value
data:
entity_id: ${notifications}
value: ""
- lvgl.page.show: page_home
- image:
align: BOTTOM_RIGHT
pad_right: 30
pad_bottom: 10
src: icon_check
image_recolor: 0xffffff
image_recolor_opa: COVER
opa: 50%
on_press:
then:
- homeassistant.action:
service: input_text.set_value
data:
entity_id: ${notifications}
value: ""
- lvgl.page.show: page_home
## Assistant page
## Página del asistente
- id: page_assistant
bg_color: 0x52c0f3
scrollbar_mode: "OFF"
scroll_snap_x: none
scroll_dir: NONE
widgets:
- label:
align: TOP_LEFT
text_font: font_info_icons_little
text_color: 0xffffff
text: "\U0000e62e"
pad_left: 50
pad_top: 32
- label:
align: TOP_LEFT
text: "Asistente inteligente"
text_font: font_device_name
text_color: 0xffffff
pad_left: 100
pad_top: 30
- obj:
styles: button_more
on_press:
then:
- lvgl.page.show: page_home
widgets:
- label:
text_font: font_device_icons_little
text_color: 0xffffff
text: "\U0000e879"
- obj:
align: CENTER
width: 1200
height: 550
radius: 36
bg_color: 0x1f1f1f
bg_opa: 50%
border_width: 0
y: 40
widgets:
- image:
id: lbl_assist_icon
align: BOTTOM_LEFT
src: icon_assist_active
image_recolor: 0xffffff
image_recolor_opa: COVER
opa: 10%
- label:
id: lbl_assist_command
width: 960
align: TOP_MID
y: 40
text_align: CENTER
long_mode: WRAP
text_font: font_info_text
text_color: 0xffffff
text_opa: 70%
text: ""
- label:
id: lbl_assist_awake
width: 1000
align: CENTER
text_align: CENTER
long_mode: WRAP
text_font: font_notification
text_color: 0xffffff
text: "Te escucho..."
6. Once you finish editing the code, click “Save” and then “Install”. Select “Manual download” and wait for the code to compile.
7. When it’s done, choose “Factory format” to download the corresponding .bin file.
8. Now go to the ESPHome page and click “Connect”. In the pop-up window, select your board and click “Connect.”
9. Click “Install” and select the .bin file you obtained in step 7. Then click “Install” again.
10. Go back to Home Assistant and open Settings > Devices & Services. Normally your device will have been discovered automatically and should appear at the top, waiting for you to click “Configure”. Otherwise, click “Add Integration”, search for ESPHome, and enter your board’s IP address in the Host field. As always, I recommend assigning it a static IP in your router to prevent future issues if the address changes.
11. Finally, go to Settings > Devices & Services > ESPHome. Click “Configure” for your device. In the pop-up window, check “Allow the device to perform Home Assistant actions” and click “Submit”. This will let us control our devices from the screen.
Customizing Habbit Desk PRO
Alright, now that you’ve finished integrating the M5Stack TAB5 into Home Assistant, let me explain in detail how it works so you can customize it however you like.
Interface Walkthrough
The Habbit Desk PRO interface is as simple as it is powerful. Thanks to the device’s generously sized display, I was able to show a lot of useful information on the home screen.

On the left, you’ll find the current date and time, along with an icon representing the current weather condition. Below that is a small animation (which you can customize with whatever images you want) that doesn’t just serve an aesthetic purpose, but also alerts you when there’s an unread notification (I’ll explain how that works later). Below that, the environmental data for the room is shown (temperature, humidity, and CO2 level).
On the right, you’ll find icons indicating the connection status, speaker status, and battery level. Below that are 3 super useful widgets:
· The first one shows the next calendar event. If you have an event on the same day, the text appears in blue to catch your attention. Also, when an event is in progress, the widget turns into a progress bar so you can instantly see how much time is left.
· The second one controls a media entity, showing what you’re listening to and the current progress through the track, and it includes playback controls.
· The third one, under normal conditions, shows the progress percentage toward a goal you’ve set (in this case, subscribers to this YouTube channel). However, when there’s a task in progress (such as a robot vacuum cleaning run or a 3D print job), it shows the task’s progress instead, and the widget becomes a shortcut to the device’s expanded control screen.
Finally, below these widgets I included quick access to the devices I use most often, along with the Home Assistant icon, which takes us to another screen from which I can control all the devices.

Quick Device Customization
In the first lines of the code you’ll find several parameters you can easily customize by replacing their values:
· Name: The name the device will use within ESPHome (it cannot contain spaces, uppercase letters, or special characters).
· Friendly_name: The “friendly” name the device will appear as in Home Assistant.
· Background_color: The hex code for the screen background color, prefixed with 0x (for example, 0x000000).
· Text_color: The hex code for the main text and icons (clock, sensors, etc.).
· Text_color_secondary: The hex code for secondary text and icons (date, inactive devices, etc.).
· Iddle_time: The idle time after which the screen automatically turns off.
· Animation_active: URL of the image shown when the device is active.
· Animation_iddle: URL of the image shown briefly after a few seconds pass.
· Animation_alert: URL of the image shown when there is a pending notification.
· Icon_ha: URL of the image that opens the device menu.
· Image_3dprinter: URL of the image shown on the 3D printer control page.
· Image_vacuum: URL of the image shown on the robot vacuum control page.
Home Assistant Entities
The next part of the code shows how we import information from Home Assistant entities into our device. This is used either to display their status on screen or to control them from the display.
If you want to reuse the template, you only need to replace the example entities with the ones from your own installation. If you want to modify the interface, I suggest taking a look at how I use them:
· Entities with numeric values (such as temperature or humidity) are found under the sensor component in the code.
· Entities with textual values (such as “on” or “cleaning”) are found under the text_sensor component in the code.
Device Control
As mentioned earlier, if you tap the Home Assistant icon from the home screen, you’ll reach a page where you can display as many devices as you want. In fact, I designed it so you can create multiple pages and move between them using the icon in the top-right corner.

We’ve also created some expanded screens for specific devices, such as sliders for the room blinds, or a dedicated screen for my 3D printer.

Notifications and Alerts
Another feature I love about the Habbit Desk PRO is that it shows me notifications when something happens that I want to be aware of. For example, when someone rings the doorbell or when the washing machine finishes. It does this by changing the animation on the home screen and, if I tap on it, taking me to a screen that tells me what happened.

To achieve this, I simply created a text helper ( input_text.notificaciones_habbit_desk ) that I update from various automations. When this helper is updated, the notification is triggered.
Voice Assistant
Tab5 includes two microphones and a speaker which, together with its display, work wonderfully as a voice assistant device, turning it into a true all-in-one.
We’ve also managed to configure it with a response time of under 1 second, and configured the screen to show when it activates, and to display both the spoken command and the response.

Source: AguacaTEC
Author: TitoTB

Got a free weekend and a drawer full of half-finished maker ideas? StickC-Plus SE is small enough to fit in your pocket, but it still packs a color display, an IR transmitter, buttons, a mic, a buzzer, RTC, Wi-Fi, and a battery, all for about $19. It keeps the everyday essentials and gives you a low-cost, plug-and-play way to turn "cool idea" into "it actually works" before Monday.
Here are five small builds to get you started. None of them need more than a free afternoon.

1. A Programmable IR Remote
Tired of juggling three remotes for your AC, TV, and projector? StickC-Plus SE’s built-in IR transmitter can send infrared commands, so once you have the IR code you need, you can turn one tiny device into a programmable remote with a bit of UIFlow or Arduino code.
It is a simple project, but a satisfying one. Press a button, send a command, and suddenly your tiny IoT controller is doing something useful in the real world.
2. A One-Button Smart Home Scene Trigger
Sometimes you do not need another app. You just need a button.
Use the built-in button on StickC-Plus SE to trigger a Home Assistant scene, a webhook, or an MQTT message. “Movie night” can become one press away: lights dim, TV powers on, and your desk setup switches into evening mode. The buzzer can give you a quick confirmation beep, so you know the command went through.
This is the kind of tiny smart home project that feels small while you are building it, then becomes something you actually use.
3. A Desk Status Display
Working from home and tired of people knocking mid-call? Turn StickC-Plus SE into a tiny Wi-Fi status display.
Show “In a Meeting,” “Free to Chat,” today’s weather, a Pomodoro timer, or a simple server status message. The color display is easy to glance at, and since StickC-Plus SE has Wi-Fi, you can update the screen from a local script, dashboard, or simple cloud service.
4. A Classroom IoT Demo Kit
If you are teaching or learning the basics of IoT, StickC-Plus SE is a friendly “everything in one small device” starting point.
Students can press a button, see a response on the display, trigger the buzzer, read simple input, and send data over Wi-Fi without setting up five separate modules first. That makes it useful for STEM classes, robotics clubs, workshop demos, and beginner IoT lessons.
For learners, the magic is simple: press something, see something change, make something happen.
5. A Sensor Prototype with M5Stack Units
Want to prototype a small greenhouse monitor, a room temperature display, or a door-open alert? Plug in an M5Stack Unit and StickC-Plus SE can become a quick sensor prototype without a breadboard.
Because it works with the M5Stack Unit ecosystem, you are not limited to what is built in. Add a temperature and humidity Unit, a PIR sensor, a relay, or another module that matches your idea. The result is less “start from scratch” and more “plug in the part you need and start building.”
Start Small, Build Something Useful
None of these projects need to be perfect, or even finished by Sunday night. That is kind of the point. StickC-Plus SE is made for the “let’s just try it” kind of weekend.
Pick a project, plug in a Unit if you need one, open UIFlow or Arduino, and see what you end up building.
Explore the details of StickC-Plus SE now, or compare it with other models in the M5Stack Stick Series comparison guide to find the right tiny IoT controller for your next build.

We present to you a small smart switch that, at first glance, seems to offer nothing new but is, in fact, different from anything we’ve encountered before. This little device called SwitchC6 from M5Stack surprised us. The concept isn't new, but the fact remains that this smart switch, as far as we know, has no direct equivalent on the market.

The SwitchC6 smart switch comes in a slightly different housing than what we are used to from this manufacturer. The plastic casing is "milky" and translucent, hiding more than it reveals. It is designed to be mounted on a DIN rail in a distribution board, though it can also be screwed down or simply left in a junction box as is. On the sides, there are two spring-loaded ("Wago-style") terminals, labeled L-In and L-Out, which can accept wire cross-sections from 0.5 to 4 mm². These are the only terminals through which any wires can be connected to this switch. But more on the connection later.

Opening the casing—not an easy task—we see that a relay capable of handling a maximum of 16 Amps at 250 Volts is used to break the phase (L - Live). The relay operates at five volts, provided by a tiny transformer located right next to it. On the top side of the PCB, there are several tall components, such as capacitors. One of these tall components is the ESP32-C6-MINI-A module, mounted sideways, which gives this switch its "gateway to the world." We have written about this MCU several times before, so we won't repeat ourselves. The ESP32-C6 comes pre-loaded with the appropriate firmware, though we’ll cover that later too. PTH pins for (re)programming are exposed if you wish to use the switch outside of M5Stack's intended ecosystem. A button on the side serves two purposes: it can toggle the relay or be used for broadcasting/transmitting signals or data. There are also two LEDs: Green, which indicates the relay status, and Blue, which indicates the capacitor charging status.
As mentioned, this smart switch does not use a classic power supply via mains voltage as we would expect (like the device in the following text). For example, in typical situations, we would have one connection for mains voltage (Live and Neutral) if mains regulation exists on the device, as is the case here. We would then have one input and one output—the line to the load (hereafter: the light bulb)—which we would break using the relay.
Here, we have only a Live input and an output to the load. So, how does this device work? How is the electronics powered? Where does it get its Neutral from? As we know, for energy to flow, the electrical circuit must be closed. And it is—through the light bulb. M5Stack has resorted to a very interesting trick. The Neutral is already connected to the bulb, and we provide the Live via the switch as needed. This means that the wire coming to the switch pulls the Neutral through the bulb, which is always present at the switch while it is off. Therefore, at the switch location, we always have the Live, but also the Neutral through the bulb, while it is off. When we close the contacts on the switch, we send the Live to the bulb, "closing" the circuit between Live and Neutral, which heats the filament and produces light. Okay, if the relay is off, we have Live at L-In and Neutral via the bulb at L-Out, so it's clear how the switch gets its power. It is worth stressing that even when the relay is off, the device should not be treated as fully de-energized; before any installation or maintenance work, the upstream main breaker should be switched off. But what happens when we activate the relay? At that point, the Live flows through the relay, through L-Out, and goes to the bulb. Where is the Neutral then?
To lift the veil on this topic, we need to shift our thinking from red and black wires to brown and blue—that is, from low/direct current to high/alternating current. If we connect one bulb to the switch, it will work at full power. However, with one switch, we can connect multiple bulbs in series and/or parallel. If we connect them in parallel, meaning each bulb has a direct connection to Neutral and a direct connection to Live via the switch, both will shine at full intensity because they have an identical power supply. If one burns out, the others will work without a problem. Only the contacts on the switch might suffer from a higher number of bulbs. If we connect the bulbs in series, the circuit behaves like a voltage divider. The voltage is divided between the bulbs as consumers, so they won't shine at full intensity; they will be partially dimmed, regardless of a stable mains supply. How much they dim depends directly on the number and wattage of the bulbs. If one bulb burns out, the circuit is broken, and the others won't light up either.

The series connection method is also used in this switch, but since the switch itself is an extremely low consumer, the voltage drop across the bulb will not even be noticeable. For this purpose, M5Stack used the BP8006, a single-phase, single-wire smart power panel IC. Unfortunately, the complete documentation for this integrated circuit is in Chinese, so we cannot tell you more about it. When the switch is first connected to the mains, it is necessary to wait a few minutes for the capacitors to charge, which we will know when the blue light turns off. The ESP32-C6 and the electronics on the PCB will draw power from the capacitors if, for example, the bulb has burned out. If we don't replace it for a long period, the capacitors will discharge; after replacement, the capacitors will begin their charging cycle again. Power to the switch can also be cut if we add a classic switch upstream that we turn off as needed. We are very interested in the schematic, but we haven't found it for this switch. Keep in mind that in the "off" state, the switch receives both Live and Neutral, but it does not send the Live through its transformer windings to the bulb.
The firmware on the switch uses an ESP-Now Mesh network. We haven't written about ESP-Now yet, and we owe you that. For now, we'll just say it's internal communication between two or more ESP devices, through which data is exchanged via a 2.4 GHz radio link. For pairing with the controller that will manage this switch, the MAC address printed under the DIN rail mount is used.
To control the switch with the factory firmware, M5Stack suggests using, for example, the CoreS3, which we already have. We use the existing firmware on the switch, and for the CoreS3, we add the M5SwitchC6-ESP-NOW library, which comes with two examples: Broadcast_Scan and Controller. The first example scans for available switches and ESP-Now transmissions in general, while the second is used to control the switch. Within the example, it is necessary to modify the local network data and the switch's MAC address. There is a template for how communication works, where the switch and controller send data to each other. The entire packet consists of MAC addresses, relay state, communication channel, and capacitor voltage. With certain additions to the example, we can add more of these switches and use the CoreS3 to send statuses to a server and synchronize with the server state. This would allow us to use a mobile phone to manage the switch.
The M5Stack SwitchC6 is a very interesting solution for situations where only one wire is available. We tested it with a classic bulb and an LED, and we had no problems; everything functioned perfectly. Finally, we should add that the wireless module comes with an unpopulated header through which we could use two additional IOs, isolated via a CA-IS3642HW digital isolator.
Source: SK LABS
Author: Dejan Petrovic

As Anthropic continues expanding Claude’s hardware interaction capabilities, experiences that once lived only on a computer screen can now be brought to life through compact hardware devices. AI is starting to evolve from a “helper inside the screen” into a true “companion on your desk”.

Among today’s most talked-about Claude hardware interaction projects, M5Stack devices have emerged as one of the most popular platforms among developers, with official recommendations from Claude. More and more makers are using M5Stack hardware to build their own Claude Desktop Buddy devices—small companions that can display Claude’s status, notify users when authorization is needed, respond to interactions, and even act like a desktop pet while you work.
Within the M5Stack ecosystem, several representative Claude Buddy approaches have already emerged.
Claude’s Official Demo: Claude Desktop Buddy with StickC Plus
One of the first projects to spark widespread interest was Anthropic’s official public demo: Claude Desktop Buddy, built with ESP32 & Arduino on the M5Stack StickC Plus.

GitHub: https://github.com/anthropics/claude-desktop-buddy
At its core, Claude Desktop Buddy is a desktop companion that connects to Claude Desktop via BLE. Once connected, the device reacts to Claude’s working state in real time:
· It stays calm while idle
· Wakes up when a conversation begins
· Shows an active working state while Claude is busy
· Alerts the user when authorization is required
· Allows approvals or rejections directly on the device
It is much more than a simple status indicator, for it behaves more like a desktop pet with personality. The project includes 18 built-in ASCII pet characters, each with multiple animation states. It also supports custom GIF character packs, making it easy for developers to create their own personalized Buddy. On top of that, it includes interactive behaviors such as:
· Shake detection
· Flip-to-sleep
· Automatic screen timeout
· LED alerts during authorization requests
Depending on Claude’s state, the Buddy can appear sleepy, idle, busy, waiting for attention, celebrating, dizzy, or even showing affection—making the interaction feel much more lively and expressive.
Getting started is also relatively straightforward. Developers can flash the firmware to the StickC Plus using PlatformIO, enable Developer Mode in Claude Desktop, open the Hardware Buddy window, and pair the device over Bluetooth. Once connected, the desktop app and hardware can automatically reconnect and continuously stay in sync.

It is no surprise that StickC Plus was chosen for Claude’s first official example. With its built-in screen, buttons, IMU, and BLE, it already covers nearly all the core requirements of a Claude Buddy without needing additional peripherals. Its compact form factor makes it easy to hold in your hand or place directly on your desk. It works well as a status display while also remaining convenient for quick interactions. If you want to quickly experience Claude Buddy, or build an eye-catching AI desk companion, StickC Plus is a highly recommended choice.
Recommended in Anthropic’s Developer Conference: Build with Claude on Cardputer-Adv
Besides the BLE-based desktop pet approach, another highly interesting direction comes from Anthropic’s developer conference, Build with Claude, where M5Stack Cardputer-Adv is used as the core device and has been well received by participating developers.
Compared with StickC Plus, which focuses more on desktop presence and status feedback, the Cardputer-Adv route emphasizes something different: letting Claude Code directly participate in the hardware creation process itself. In other words, Claude can help not only write applications, but also assist with flashing, deployment, and iteration.

More info: https://claude.com/code-with-claude/makers
Technically, this solution follows a UIFlow + MicroPython rapid development path, combined with Claude Code and related skills for setup and deployment. The project repository already includes scripts, Buddy app packages, and an extensible app directory. Developers can either run the existing project directly or continue adding their own .py applications to expand functionality over time. For anyone who wants to experience the idea of “AI helping me build hardware applications”, Cardputer-Adv is a very representative and exciting option.
Cardputer-Adv itself is also well suited to this role. With its built-in keyboard and screen, interaction feels more natural, whether for navigating menus, displaying Claude status, or running lightweight applications. Combined with the ESP32-S3’s connectivity and expandability, it naturally fits the concept of a portable AI mini terminal. It can become: a weather assistant, a pixel pet, a pocket utility tool, or simply your own personalized Claude Buddy.

One of the biggest advantages of this workflow is how direct it feels. You connect the Cardputer-Adv, open Claude Code, and enter “m5-onboard go”.
From there, the toolchain can automatically handle device detection, firmware flashing, app installation, rebooting, and startup. This makes it especially suitable for hackathons, workshops, and rapid prototyping sessions—bringing the vision of “build what you imagine” much closer to reality.
More M5Stack Devices Are Joining the Claude Desktop Buddy Ecosystem
Beyond these two examples, many other M5Stack host devices are also well suited to Claude Buddy-style projects. The community is already beginning to adapt related ideas to devices such as StickC Plus2, StickS3, Paper, and more.
A good Desktop Buddy needs to bring together display, interaction, connectivity, and local processing, and these are exactly the strengths shared by many M5Stack host devices. Whether it is from the Core, Stick, Atom, Cardputer, or E-Paper product lines, M5Stack offers a broad and mature hardware portfolio for developers to choose from.
For Claude Buddy-style applications, devices with a screen, buttons, or input methods, sensors, BLE, or Wi-Fi connectivity are naturally strong candidates.
 |
 |
 |
 |
M5Stack continues to be a go-to device for developers for several reasons:
· Ready to use out of the box — highly integrated and easy to develop with
· Low barrier to entry — support for multiple development platforms, including Arduino, UIFlow, ESP-IDF, MicroPython and more
· Great for visual presentation and demos — ideal for desktop setups, demos, workshops, exhibitions, and event showcases
· Complete hardware ecosystem — covering controllers, expansion modules, sensors, and accessories for fast prototyping and continuous expansion
· Large developer community — widely recognized by the global maker community, with abundant documentation and community resources
From Software Assistant to Physical Companion
The rise of Claude Buddy is just one example of how large-model AI is moving from the software world into the physical world. As more AI applications begin to leave the chat window and enter desktop devices, portable terminals, and real-world interaction scenarios, hardware is becoming an increasingly important bridge between AI and everyday life.
With its complete hardware ecosystem, highly integrated product design, and developer-friendly experience, M5Stack is becoming an important physical platform for developers around the world to connect large AI models with the real world. It is also opening up broader possibilities for AI desk companions, smart terminals, and innovative prototyping.

In the demanding landscape of industrial automation, reliability and adaptability are the benchmarks of success. The StamPLC, anchored by the high-performance Stamp-S3A module, is a specialized IoT controller engineered to bridge the divide between professional-grade logic control and the flexibility of the smart home. By bringing the StamPLC into your Home Assistant ecosystem via ESPHome, you gain access to an enterprise-level automation suite for everything from remote telemetry to high-voltage AC management. This guide provides a comprehensive walkthrough of the deployment process, from initial flashing to the configuration of specialized PoE and AC expansion modules.

Preparations
o A Home Assistant host
o Install and enable the ESPHome Builder add-on in Home Assistant
Open ESPHome Builder in Home Assistant and create an empty configuration file:
o Click the NEW DEVICE button at the bottom right
o In the dialog click CONTINUE
o Select Empty Configuration

o (Optional) Give the file a name
o Click EDIT on the newly created configuration file

o Then copy the contents of configuration.yaml from the example repository into your config file:

Modify network or API information as needed. For example, create an API Encryption Key for authentication:
api:
  encryption:
    key: "Your_Encryption_Key"
You can also change the timezone setting, for example:
timezone: America/Los_Angeles # Pacific
# timezone: America/New_York # Eastern
After editing, click SAVE and then INSTALL, choose Manual download.

This will generate code and compile the project.
When the build finishes, select Factory format to download the firmware.

Upload firmware
Open ESPHome Web in your browser to upload the firmware.
Connect StamPLC to the host via USB-C, click CONNECT and select the device.
Click INSTALL, select the previously downloaded firmware, and click INSTALL again to flash the device.
After flashing completes the device will automatically reset and boot.

Add device to Home Assistant Integrations
When the device boots it will connect to the configured Wi‑Fi. Under Settings -> Devices & services you should see the device.

Click Add to add StamPLC to Home Assistant. If you set an API Encryption Key, you may need to enter it here.
Example StamPLC dashboards:


Live device in action:

Expansion
The StamPLC support expansion via 16 pin headers on the right side of the device.

StamPLC AC is an AC relay expansion module compatible with the StamPLC host. The module integrates AC load control and entire system power supply functions, effectively simplifying power wiring during application development. It features a contact-type relay (single-pole single-throw - normally open), supporting up to AC 240V@10A line switching. It also includes a built-in AC-DC isolated conversion circuit supporting AC 100 ~ 240V input, capable of simultaneously powering the relay load and providing a stepped-down DC 12V output for the main system. A programmable tri-color RGB LED is available for working status indication.
Configure the StamPLC AC
In addition to previous StamPLC configurations, several components are required
o Add a new IO Expander
pi4ioe5v6408:
  - id: pi4ioe5v6408_1
    address: 0x43
  # Configuration of i2c GPIO Expander 2
  # on the StamPLC AC expansion
  - id: pi4ioe5v6408_2
    address: 0x44
o Add a new switch for AC Relay
switch:
  ...
  # led indicator on StamPLC AC expansion
  - platform: gpio
    restore_mode: ALWAYS_OFF
    id: "ac_relay_led_red"
    pin:
      pi4ioe5v6408: pi4ioe5v6408_2
      number: 5
      inverted: true
      mode:
        output: true

  - platform: gpio
    restore_mode: ALWAYS_OFF
    id: "ac_relay_led_green"
    pin:
      pi4ioe5v6408: pi4ioe5v6408_2
      number: 6
      inverted: true
      mode:
        output: true

  - platform: gpio
    restore_mode: ALWAYS_OFF
    id: "ac_relay_led_blue"
    pin:
      pi4ioe5v6408: pi4ioe5v6408_2
      number: 7
      inverted: true
      mode:
        output: true
o UI Update the UI display
display:
  ...
  lambda: |-
    ...
    it.print(5, 80, id(font1), Color(orange), "Relays 1-4");
    it.filled_rectangle(5, 99, 25, 25, id(r1).state ? id(red) : id(grey));
    it.filled_rectangle(34, 99, 25, 25, id(r2).state ? id(red) : id(grey));
    it.filled_rectangle(63, 99, 25, 25, id(r3).state ? id(red) : id(grey));
    it.filled_rectangle(92, 99, 25, 25, id(r4).state ? id(red) : id(grey));
    it.print(141, 80, id(font1), Color(orange), "AC Expansion");    // The AC Relay Expansion
    it.filled_rectangle(141, 99, 25, 25, id(ac_r1).state ? id(red) : id(grey));
  ...
When finishing the configuration, recompile and upload the firmware. Then, you should be able to control additional AC relay in your Home Assistant:

Turn on/off the switch, the UI element on LCD will change accordingly.


StamPLC PoE is an Ethernet control module designed for the StamPLC host. It supports PoE (Power over Ethernet) technology, enabling both data transmission and power supply through a single Ethernet cable. The module integrates a W5500 embedded Ethernet controller with a built-in TCP/IP protocol stack, providing 8 independent hardware sockets, a 10/100M Ethernet data link layer (MAC), and physical layer (PHY). It supports mainstream network communication methods such as UDP and TCP.
To enable PoE functionality, disable the wifi, display, and spi components (remove their declarations/definitions from the configuration file). Then add the following to the original configuration file:
ethernet:
  id: ethernet_1
  type: W5500
  clk_pin: GPIO7
  mosi_pin: GPIO8
  miso_pin: GPIO9
  cs_pin: GPIO11
  clock_speed: 20MHz
Save and install, then upload the firmware. Use a PoE switch or router to power the device while providing network connectivity.

Ready for Deployment
With the firmware flashed and your expansion modules configured, your StamPLC is no longer just a piece of hardware—it is now a sophisticated gateway for your automation needs. The beauty of this setup lies in its modularity; whether you are scaling up with StamPLC PoE for high-reliability data or utilizing StamPLC AC relays for heavy-duty switching, the combination with Home Assistant provides a unified, professional interface for it all.
Now that your foundation is built, you can move beyond basic setup and start creating the complex logic, schedules, and automations that make your industrial or home environment truly intelligent.

Introduction
The Chain DualKey is a programmable dual-button input development board. Its factory firmware allows you to configure button functions and RGB LED colors, as well as other Chain series devices connected via the Chain Bus.

Ready to unleash its full potential? This guide will walk you through everything from firmware flashing via M5Burner to advanced Web-based configuration. Master the core essentials in minutes and make your desktop setup smarter and more efficient.
Steps
1. Button Numbering
In the factory firmware, the two buttons on Chain DualKey are named Key1 (Left Key) and Key2 (Right Key):

2. Switch Positions
3. Connecting to Host as Keyboard
Chain DualKey can connect to two devices simultaneously — one via a wired connection and the other via Bluetooth.
4. Configuration Web Page
Power the Chain DualKey via an external power source or toggle the switch to left / right side. On your computer or smartphone, connect to the Wi-Fi access point (SSID: DualKey_XXXX (XXXX is a four-character alphanumeric code used to distinguish different devices), Password: 12345678), then open a browser and visit 192.168.4.1 to access the configuration web page:


5. Chain Bus
Chain DualKey can connect to other Chain series devices—such as Chain Key and Chain Joystick—through the Chain Bus on either side. (More Chain series devices will be released soon.)
Devices in the Chain series can be connected via Chain Bridge or Chain Return. When connecting, pay attention to the direction: the triangle arrow at the bottom of each device should point outward from the Chain DualKey (the main controller), as shown below:

At the bottom of the configuration web page, you can view and configure the functions of all devices connected to the Chain Bus:

Conclusion
With your Chain DualKey now fully configured, you are ready to enjoy a more intuitive and efficient desktop experience. From custom macros to vibrant RGB setups, this compact device is designed to evolve alongside your workflow. Stay tuned for more Chain series modules to further expand your creative setup!

Today, we are going to integrate the M5Stack TAB5 into Home Assistant (HA), a very interesting device for creating a portable control dashboard.
M5Stack Tab5
· Powered by an ESP32-P4 SoC, with 16MB of flash memory and 32MB of PSRAM. This makes it the device with the most memory we have integrated into Home Assistant to date.
· It features a generous 5″ TFT touchscreen (1280×720), compatible with LVGL.
· Includes a front-facing 2 MP SC2356 camera (1600×1200) for capturing images and video.
· Equipped with one USB-A port, one USB-C port, and a Micro SD card slot (card not included).
· It has two expansion ports for external sensors (GROVE and M5BUS) and a connector for a LoRa antenna.
· Features two microphones, a speaker, and a 3.5mm jack, meaning you can also use it to control Assist.
· If you chose the "TAB5 Kit," it comes with a Li-ion battery that you can easily replace (allowing you to have a spare one charged and ready).

In short, these characteristics make it the perfect candidate for a portable, autonomous control device with great tactile feedback. Additionally, as it is based on an ESP32-P4, the M5Stack TAB5 can be integrated into HA via ESPHome.
Prerequisites
To integrate the M5Stack TAB5 into HA, you will first need:
· Your M5Stack Tab5 (with or without the battery).
· To have ESPHome installed in Home Assistant.
· A USB-C DATA cable to power the board (you will not be able to install the software with a charge-only cable).
Configuration in ESPHome
Follow these steps to integrate the M5Stack TAB5 into HA:
1. In Home Assistant, go to your ESPHome add-on and click on New device > Continue > New Device Setup.
2. Give your device a name (for example, “M5stack Tab5”) and click “Next.”
3. For the device type, select “ESP32-C6.” You will notice in the background that a new block has been created for your device.
4. Click “Skip” and then click “Edit” on your device's block. Copy the code that appears and save it, as you will need parts of it later.
5. Copy the following code and use it to replace the previous code in ESPHome.
substitutions:

# Device customization
# Personalización del dispositivo

  name: m5stack-tab5
  friendly_name: M5stack Tab5

####################################

esphome:
  name: ${name}
  friendly_name: ${friendly_name}

esp32:
  board: esp32-p4-evboard
  flash_size: 16MB
  framework:
    type: esp-idf
    advanced:
      enable_idf_experimental_features: true

esp32_hosted:
  variant: esp32c6
  active_high: true
  clk_pin: GPIO12
  cmd_pin: GPIO13
  d0_pin: GPIO11
  d1_pin: GPIO10
  d2_pin: GPIO9
  d3_pin: GPIO8
  reset_pin: GPIO15
  slot: 1

logger:
  hardware_uart: USB_SERIAL_JTAG

psram:
  mode: hex
  speed: 200MHz

api:
  encryption:
    key: "F8WsdfddfKt1XvQV9pU32443dsfdsf"

ota:
  - platform: esphome
    password: "sdffds23b12747edfq43543"

wifi:
  ssid: !secret wifi_ssid
  password: !secret wifi_password
  ap:
    ssid: "M5Stack-Tab5 Fallback Hotspot"
    password: "sdfdMtQR34rfww"

# Sensors configuration
# Configuración de sensores

binary_sensor:
  - platform: gpio
    id: charging
    name: "Charging Status"
    pin:
      pi4ioe5v6408: pi4ioe2
      number: 6
      mode: INPUT_PULLDOWN

  - platform: gpio
    id: headphone_detect
    name: "Headphone Detect"
    pin:
      pi4ioe5v6408: pi4ioe1
      number: 7

i2c:
  - id: bsp_bus
    sda: GPIO31
    scl: GPIO32
    frequency: 400kHz

pi4ioe5v6408:
  - id: pi4ioe1
    address: 0x43
    # 0: O - wifi_antenna_int_ext
    # 1: O - speaker_enable
    # 2: O - external_5v_power
    # 3: NC
    # 4: O - lcd reset
    # 5: O - touch panel reset
    # 6: O - camera reset
    # 7: I - headphone detect
  - id: pi4ioe2
    address: 0x44
    # 0: O - wifi_power
    # 1: NC
    # 2: NC
    # 3: O - usb_5v_power
    # 4: O - poweroff pulse
    # 5: O - quick charge enable (inverted)
    # 6: I - charging status
    # 7: O - charge enable

select:
  - platform: template
    id: wifi_antenna_select
    name: "WiFi Antenna"
    options:
      - "Internal"
      - "External"
    optimistic: true
    on_value:
      - if:
          condition:
            lambda: return i == 0;
          then:
            - switch.turn_off: wifi_antenna_int_ext
          else:
            - switch.turn_on: wifi_antenna_int_ext

# The DAC Output select needs to be manually (or with an automation) changed to `LINE1` for the onboard speaker
  - platform: es8388
    dac_output:
      name: DAC Output
    adc_input_mic:
      name: ADC Input Mic

sensor:
  - platform: ina226
    address: 0x41
    adc_averaging: 16
    max_current: 8.192A
    shunt_resistance: 0.005ohm
    bus_voltage:
      name: Battery Voltage
    current:
      name: Battery Current
      # Positive means discharging
      # Negative means charging

switch:
  - platform: gpio
    id: wifi_power
    name: "WiFi Power"
    pin:
      pi4ioe5v6408: pi4ioe2
      number: 0
    restore_mode: ALWAYS_ON
  - platform: gpio
    id: usb_5v_power
    name: "USB Power"
    pin:
      pi4ioe5v6408: pi4ioe2
      number: 3
  - platform: gpio
    id: quick_charge
    name: "Quick Charge"
    pin:
      pi4ioe5v6408: pi4ioe2
      number: 5
      inverted: true
  - platform: gpio
    id: charge_enable
    name: "Charge Enable"
    pin:
      pi4ioe5v6408: pi4ioe2
      number: 7
  - platform: gpio
    id: wifi_antenna_int_ext
    pin:
      pi4ioe5v6408: pi4ioe1
      number: 0
  - platform: gpio
    id: speaker_enable
    name: "Speaker Enable"
    pin:
      pi4ioe5v6408: pi4ioe1
      number: 1
    restore_mode: ALWAYS_ON
  - platform: gpio
    id: external_5v_power
    name: "External 5V Power"
    pin:
      pi4ioe5v6408: pi4ioe1
      number: 2

# Display configuration
# Configuración de la pantalla

esp_ldo:
  - voltage: 2.5V
    channel: 3

font:
  - file: "gfonts://Kanit"
    id: font_title
    size: 100

light:
  - platform: monochromatic
    output: backlight_pwm
    name: "Display Backlight"
    id: backlight
    restore_mode: RESTORE_DEFAULT_ON
    default_transition_length: 250ms

output:
  - platform: ledc
    pin: GPIO22
    id: backlight_pwm
    frequency: 1000Hz

touchscreen:
  - platform: gt911
    interrupt_pin: GPIO23
    update_interval: never
    reset_pin:
      pi4ioe5v6408: pi4ioe1
      number: 5
    calibration:
      x_min: 0
      x_max: 720
      y_min: 0
      y_max: 1280
    id: touch

display:
  - platform: mipi_dsi
    dimensions:
      height: 1280
      width: 720
    model: M5Stack-Tab5
    reset_pin:
      pi4ioe5v6408: pi4ioe1
      number: 4
    show_test_card: true
    rotation: 90

lvgl:
  touchscreens: touch
  buffer_size: 100%
  style_definitions:
    - id: style_title
      align: CENTER
      text_font: font_title
  widgets:
    - label:
        styles: style_title
        text: 'Hola Aguacater@s!!'

# Media configuration and voice assistant
# Configuración multimedia y asistente de voz

audio_dac:
  - platform: es8388
    id: es8388_dac

audio_adc:
  - platform: es7210
    id: es7210_adc
    bits_per_sample: 16bit
    sample_rate: 16000

i2s_audio:
  - id: mic_bus
    i2s_lrclk_pin: GPIO29
    i2s_bclk_pin: GPIO27
    i2s_mclk_pin: GPIO30

media_player:
  - platform: speaker
    name: None
    id: speaker_player
    announcement_pipeline:
      speaker: tab5_speaker
      format: FLAC
      sample_rate: 48000
      num_channels: 1
    on_announcement:
      # Stop the wake word (mWW or VA) if the mic is capturing
      - if:
          condition:
            - microphone.is_capturing:
          then:
            - micro_wake_word.stop:
    on_idle:
      # Since VA isn't running, this is the end of user-intiated media playback. Restart the wake word.
      - if:
          condition:
            not:
              voice_assistant.is_running:
          then:
            - micro_wake_word.start:

micro_wake_word:
  id: mww
  models:
    - okay_nabu
    - hey_mycroft
    - hey_jarvis
  on_wake_word_detected:
    - voice_assistant.start:
        wake_word: !lambda return wake_word;

microphone:
  - platform: i2s_audio
    id: tab5_microphone
    i2s_din_pin: GPIO28
    sample_rate: 16000
    bits_per_sample: 16bit
    adc_type: external

# Commented out to avoid duplicates (see above)
# Comentado para evitar duplicidades (ver arriba)
#select:
# The DAC Output select needs to be manually (or with an automation) changed to `LINE1` for the onboard speaker
#  - platform: es8388
#    dac_output:
#      name: DAC Output
#    adc_input_mic:
#      name: ADC Input Mic

speaker:
  - platform: i2s_audio
    id: tab5_speaker
    i2s_dout_pin: GPIO26
    audio_dac: es8388_dac
    dac_type: external
    channel: mono
    buffer_duration: 100ms
    bits_per_sample: 16bit
    sample_rate: 48000

voice_assistant:
  id: va
  microphone: tab5_microphone
  media_player: speaker_player
  micro_wake_word: mww
  on_end:
    # Wait a short amount of time to see if an announcement starts
    - wait_until:
        condition:
          - media_player.is_announcing:
        timeout: 0.5s
    # Announcement is finished and the I2S bus is free
    - wait_until:
        - and:
            - not:
                media_player.is_announcing:
            - not:
                speaker.is_playing:
    - micro_wake_word.start:
  on_client_connected:
    - micro_wake_word.start:
  on_client_disconnected:
    - micro_wake_word.stop:
6. Important note: This code does not include the credentials required for the device to connect to your WiFi and your Home Assistant instance, so you must add them manually. Specifically, I am referring to the following lines from the code you copied in step 4.
# Enable Home Assistant API
api:
  encryption:
    key: "bg6hash6sjdjsdjk02hh0qnQeYVwm123vdfKE8BP5"

ota:
  - platform: esphome
    password: "asddasda27aab65a48484502b332f"

wifi:
  ssid: !secret wifi_ssid
  password: !secret wifi_password

  # Enable fallback hotspot (captive portal) in case wifi connection fails
  ap:
    ssid: "Assist Fallback Hotspot"
    password: "ZsasdasdHGP2234"
7. What you need to do is find the corresponding lines in the code (at the beginning) and add the relevant information.
8. Now, click "Save" and "Install." Select "Manual download" and wait for the code to compile.
9. Once finished, select the "Modern format" option to download the corresponding '.bin' file.
10. Connect the M5Stack TAB5 to your computer using the USB-C data cable via the side port.
11. Now go to the ESPHome Web page and click "Connect." In the pop-up window, select your board and click "Connect."
12. Now click "Install" and select the '.bin' file obtained in step 9. Click "Install" once more.
13. Return to Home Assistant and go to Settings > Devices & Services. Your device should normally be discovered and appear at the top, simply waiting for you to click the "Configure" button. Otherwise, click the "Add Integration" button, search for "ESPHome," and enter your board's IP address in the "Host" field. As always, I recommend that you assign a static IP in your router to avoid future issues if it changes.
14. Finally, go to Settings > Devices & Services > ESPHome. Click the "Configure" link for your device. In the pop-up window, check the box "Allow the device to perform Home Assistant actions" and click "Submit." This will allow us to control our devices directly from the screen.
If everything went well, you should see the following on your screen:

Additionally, with this code, you will be able to:
· Control and monitor the device's sensors in Home Assistant (such as battery percentage, activating the speaker, turning on the screen…).
· Use the screen to create your control dashboard and manage your devices.
· Expose your M5Stack Tab5 as a media player entity, allowing you to use it to play audio notifications or the radio.
· Use it as a voice assistant if you have already configured Assist.
From here on, the way you use the panel depends on your imagination!
Source: AguacaTEC
Author: TitoTB

Hardware and Design
The Cardputer-Adv is an enhanced iteration of the small-form-factor computer powered by the Espressif ESP32-S3 microcontroller. In essence, the Cardputer-Adv is a slightly redesigned version of the original. Side-by-side, they differ visually only in color—the new model is white, while the previous was light gray. The shape, design, and general purpose remain identical. The "brain" of the system is still a Stamp series development board, but upgraded to the Stamp-S3A. Compared to the Stamp-S3 found in the predecessor, the "A" revision features a redesigned 3D antenna for improved connectivity and a "softer," more responsive Reset button. Note that this button is covered by a sticker, making it somewhat awkward to press. Other changes include internal LED wiring and lower power consumption. The core remains the ESP32-S3FN8 microcontroller with 8MB of Flash and 23 GPIO pins. As we have covered the ESP32-S3 extensively in previous articles, we will not repeat those technical details here. The USB-C port is used for programming the Stamp, power delivery, and charging the integrated battery.
Display, Keyboard, and Audio
The Stamp-S3A connects to the motherboard via two header rows and interfaces with the display via an FPC connector. The screen is the same color IPS LCD used previously (ST7789V2, 240×135 resolution, 1.14 inches). A defining feature of this computer is its 4×14 (56 keys) QWERTY keyboard. The keys are significantly improved with a different tactile feel (260gf vs. 160gf actuation force). Many keys serve dual purposes via 'Fn', 'Aa', 'Ctrl', 'Opt', and 'Alt' modifiers. Keyboard scanning is now handled by the TCA8418 integrated circuit.
The audio subsystem has undergone significant changes. The ES8311 codec replaces the previous NS4168 and SPM1423 combination, resulting in superior microphone noise reduction. Combined with the NS4150B amplifier and a 1W speaker (located standardly beneath the Stamp), the output quality is markedly better. Furthermore, the Cardputer-Adv now includes a 3.5mm audio jack on the side for headphone connectivity.

Power and Connectivity
The Cardputer-Adv can be powered via USB-C or the internal battery. This version replaces the two smaller cells of the original with a single, larger 1750mAh battery, managed by the TP4057 charging IC. Like its predecessor, the Cardputer-Adv features a GROVE port (supporting I2C and 5V). A small adjacent switch allows the user to toggle the 5V line direction: the Cardputer can either power an external sensor or be powered by an external source.
While the original Cardputer relied solely on the GROVE port for expansion, the Cardputer-Adv introduces an additional 2×7-pin header (UART, I2C, SPI) on the rear for connecting peripheral devices. M5Stack continues to use the GROVE connector for its extensive ecosystem of "Unit" expansion modules.
Sensors and Modules
New features include the BMI270 six-axis motion sensor (IMU). The device retains the physical power switch, 'Boot' and 'Reset' buttons, an infrared (IR) LED, and a Micro-SD slot. Examining the PCB reveals a layout largely identical to the original; it even retains an unpopulated JST connector for a smaller battery. Interestingly, there is an unconnected FPC connector near the 3.5mm jack for which we found no official documentation. The Cardputer-Adv maintains its Lego-compatible mounting holes (though there is one row fewer on the back) and internal magnets, allowing it to be mounted on metal surfaces like a refrigerator door.
Along with the Cardputer-Adv, we received the CAP LoRa868 (now the updated version is Cap LoRa-1262) expansion module, designed to interface via the 2×7-pin header. The CAP module features a matching plastic enclosure and contains two primary components: an 868MHz LoRa module (based on the SX1262 chip) with an SMA connector for an external antenna, and an AT6668-based GNSS module supporting GPS, Beidou (BD2/BD3), GLONASS, Galileo, and QZSS.

|
|
Software and Programming
The Cardputer-Adv can be programmed using Arduino IDE, ESP-IDF, PlatformIO, or the manufacturer-recommended UiFlow2. UiFlow2 is a block-based visual programming environment, making it an excellent educational tool for introducing children to microcontrollers and electronics. The interface offers "Blocks," "Split," and "Python" views. In "Split" mode, users can see how dragging blocks generates real-time Python code—a bridge that helps beginners transition to text-based programming. To use this online tool, the UiFlow2 firmware must first be flashed onto the device using the M5Burner utility.
Several pre-configured examples are available via M5Burner, including community-driven projects. One highlight is Meshtastic for Cardputer-Adv, which integrates seamlessly with the Meshtastic mobile app for LoRa-based mesh networking and precise GPS mapping. The firmware provides a comprehensive menu for managing hardware segments like LoRa, GPS, and system time.

Conclusion
Additional examples include M5Launcher, which allows users to execute BIN files directly from the Micro-SD card. The factory demo provides a comprehensive hardware test. For those using the Arduino environment, extensive support is available via M5Stack libraries.
The Cardputer-Adv is exactly what its name suggests: a sophisticated, credit-card-sized computer with meaningful upgrades over the original. The CAP expansion module (e.g., Cap LoRa-1262) is a powerful addition, and the new 2×7-pin header opens endless possibilities for hardware hackers.
Source: SK LABS
Author: Dejan Petrovic

When using M5Stack Modules or Bases, many users run into a common problem:
The same module, when stacked on different controllers (such as Basic, Core2, CoreS3, Tab5, etc.), uses different pin definitions. So, how should you correctly configure the pin numbers in your code?
If you have the same question, then understanding how the M5-Bus and DIP switches work is crucial.
This article will explain in a clear and practical way:
By the end, you could have a much clearer idea of how to set the DIP switches on the module, and how to configure the corresponding pin numbers in your program.
|
|
|
|
|
M5-Bus is a stack expansion bus design adopted by M5Stack stacking series products (Module, Base). The interface uses 2x15P@2.54mm pin headers/sockets. The Core series controllers can quickly stack different modules via the M5-Bus to achieve functional expansion. Its fixed positions define power pins such as GND, 5V, 3V3, and BAT, ensuring compatibility with various devices; other pins vary depending on the controller model, so you need to configure your program according to the actual pin mapping.
2. Fixed Function Pins
The pin numbers of M5-Bus are fixed starting from the GND pin at the top left corner, numbered from 1 to 30. This sequence is consistent across all controllers. The pins marked with a red box are fixed-function pins (power and GND, etc.), while other pins may have different functions or GPIO mappings depending on the main controller.
3. What is a DIP Switch
A DIP Switch is a toggle switch. It is used to flexibly change the connection of key module pins to adapt to different controller models. For example, in the case of Module GPS v2.0, there are three switchable pins: TXD, RXD, and PPS. Two onboard DIP switches control which pins these signals are connected to.
DIP Switch1’s switches 1–4 control TXD, switches 5–8 control RXD; DIP Switch2 is used to control PPS.
To avoid pin conflicts, typically each function pin only needs to be switched to one pin based on actual usage requirements. For example, in the following configuration, the 1st and 5th switches on DIP Switch1 are set to ON, the 2nd switch on DIP Switch2 is set to ON, and all other switches are set to OFF.
Based on the PCB silkscreen reference:
When programming the device, you must modify the corresponding pin configuration according to the actual pin connections.
The DIP switch’s corresponding positions and numbering connected to the M5-Bus are fixed (indicated by blue box).
If the PCB silkscreen’s I/O reference table does not include the controller model you are currently using, you can refer to the existing device’s silkscreen PinMap to identify which M5-Bus pins the DIP switch connects to, and then map those to the corresponding pins of your current controller.
When using Module LoRa868 with Tab5, and the DIP switches are set as shown in the picture, which Tab5 pins are used for NSS, BUSY, RST, and IRQ, respectively?
Answer

5. Wrapping Up:
Treat the DIP Switch as a “Hardware-Level Remapping Tool”
A DIP switch essentially gives you a form of hardware-level pin remapping:
The same module can be used with different Controllers, while routing key signals (TXD, RXD, PPS, etc.) to the most suitable GPIO pins.
In practice, if the module’s silkscreen or documentation already specifies how to set the DIP switches and which pins to use for your controller (for example, Core2, CoreS3), you can simply:
If your host controller is not listed, you can follow this simple procedure:
Once you understand this workflow, you no longer need to memorize which module “must be used with which Controller.”
Instead, you can flexibly migrate and reuse modules across different controllers, according to your actual needs.






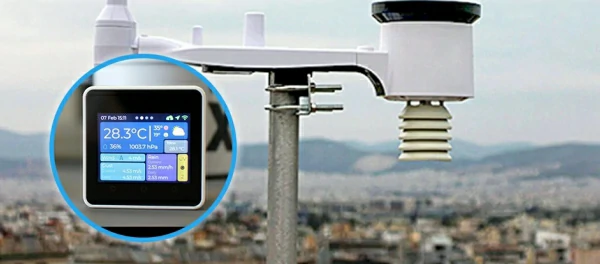












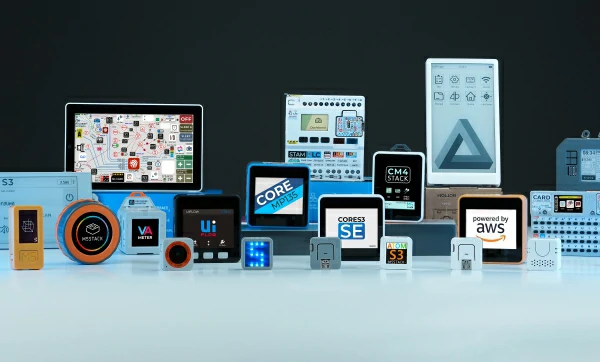
 官方商城
官方商城