STACK & PLAY
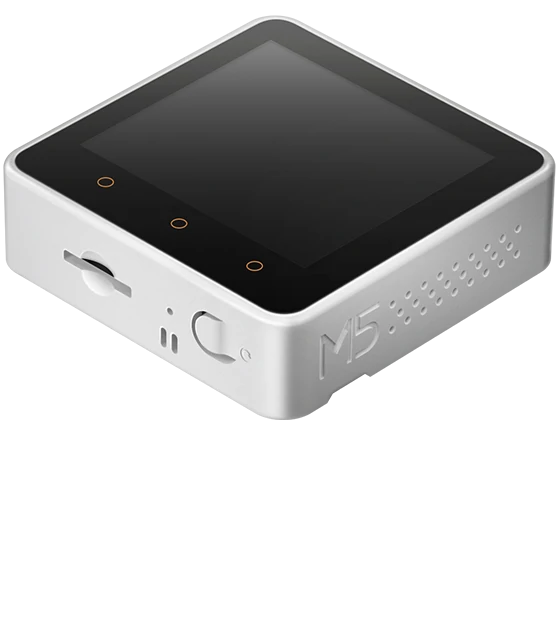
Standard 5×5cm functionally stacking modularized components hardware system.
ESP32 microcontroller、 microSD card slot、USB-C、extension connectors.
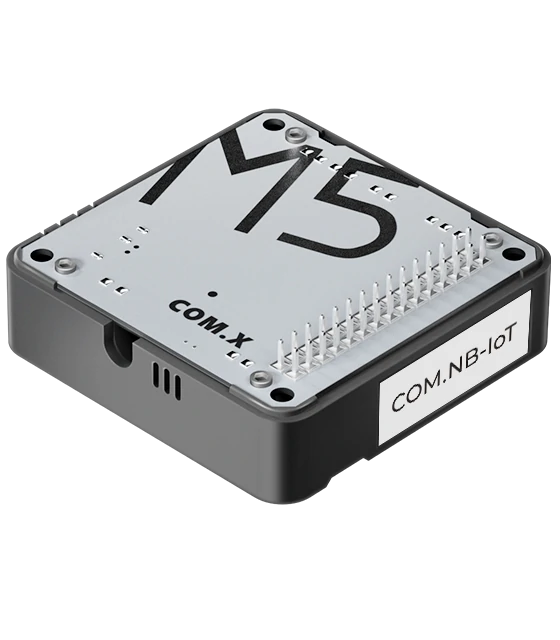
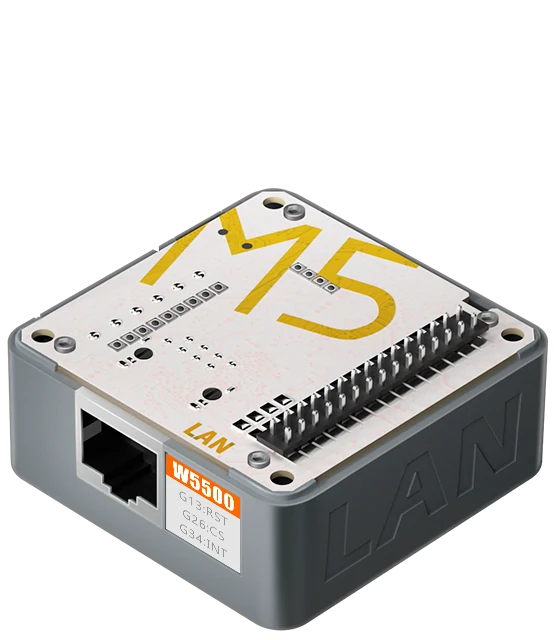
The Stacking Functional MODULES Built for Customized Assembly.
Easy Deployment with multifunctional BASE.
STACK SERIES
5×5CM MODULAR STACKABLE
Standard Size
Better Display
User Friendly
For comprehensive application
STICK SERIES
COMPACT IoT SOLUTION
All-in-one
Best in Price
Low power consumption
For IoT edge application
ATOM SERIES
SMALL SIZE, BIG USE!
Smallest ESP32 devkit
IoT edge nodes
Miniature embedded device
For smart home and industry control application
FROM PROTOTYPING TO COMMERCIAL LEVEL
END TO END IoT EDGE SOLUTIONS
SMART FACTORY
Improving efficiency, preventing risks and delivering results with connected IoT devices.
SMART AGRICULTURE
Using sensors to collect data and using edge computing devices to analyze data, helps automate farming and breeding sectors.
SMART RETAIL
Obtain and analyze data about customer behavior; Automate shopping process and optimize shopping experience.
WEATHER STATION
Field ready data-collection solutions for environmental and meteorological monitoring.
WHY CHOOSE US?
FULL RANGE IoT MODULES
From the esp32-s3 controllers, arduino esp32, esp32 kits, esp32 camera, communication modules to the sensors including sensors like tof sensor and otherand actuators; high performance, high reliability, high scalability, and quick access to cloud platforms like Azure, AWS.
QUICK DEVELOPMENT AND VERIFICATION
Stackable standardization system to facilitate rapid concept proofing, rapid verification, and rapid shipment; ISO9001 international quality system certification, FCC, CE, TELEC product certifications to ensure timeline and quality.
TECHNICAL SERVICE
DOCS database, forums and etc provide technical services, UIFlow visual rapid development tools, complete API interfaces, greatly shorten the integration time, and help product mass production.
OPEN PLATFORM
Open-source hardware, open API interface, diverse cooperation forms, more cost-effective.
88
COUNTRIES
52668
GLOBAL DEVELOPERS
280
PRODUCTS
THE LATEST FROM M5STACK

In today’s rapidly advancing world of intelligent applications, image and video management is evolving at an unprecedented pace.  

Imagine capturing breathtaking travel landscapes or precious moments of your child’s growth — and having your photos automatically categorized, tagged, and searchable via natural language. All processing happens locally, with no dependence on cloud servers, ensuring both speed and privacy. With the powerhouse performance of the M5Stack LLM‑8850 Card, bring your vision to life with an intelligent, deeply personalized photo album that’s uniquely yours.

M5StackLLM‑8850Card is an M.2 M‑Key2242AI accelerator card designed for edge devices. It is a powerful yet energy-efficient AI edge computing module, purpose-built for multi-modal large models, on-device inference, and intelligent analysis. It delivers high-performance inference for both language and vision models, and can be deployed effortlessly across diverse devices to enable offline, private AI services.

In this article, we’ll show you how to build an intelligent photo management platform with M5Stack LLM-8850 Card, making the organization of your pictures and videos smarter, faster, and more secure.

To achieve this, we’ll leverage Immich, an open‑source self‑hosted photo and video management platform that supports automatic backup, intelligent search, and cross‑device access.

This post provides an introduction to the app usage. For the latest updates and detailed information, please visit Product Guide for LLM-8850 Card Application - Immich.

Immich is an open-source self-hosted photo and video management platform that supports automatic backup, intelligent search, and cross-device access.

 1.      Manually download the program and upload it to raspberrypi5, or pull the model repository with the following command.

If git lfs is not installed, first refer to git lfs installation guide for installation.
git clone https://huggingface.co/AXERA-TECH/immich

File Description:

m5stack@raspberrypi:~/rsp/immich $ ls -lh
total 421M
drwxrwxr-x 2 m5stack m5stack 4.0K Oct 10 09:12 asset
-rw-rw-r-- 1 m5stack m5stack 421M Oct 10 09:20 ax-immich-server-aarch64.tar.gz
-rw-rw-r-- 1 m5stack m5stack    0 Oct 10 09:12 config.json
-rw-rw-r-- 1 m5stack m5stack 7.6K Oct 10 09:12 docker-deploy.zip
-rw-rw-r-- 1 m5stack m5stack 104K Oct 10 09:12 immich_ml-1.129.0-py3-none-any.whl
-rw-rw-r-- 1 m5stack m5stack 9.4K Oct 10 09:12 README.md
-rw-rw-r-- 1 m5stack m5stack  177 Oct 10 09:12 requirements.txt

2.     Import the docker image

If docker is not installed, please refer to RaspberryPi docker installation guide to install it first.
cd immich
docker load -i ax-immich-server-aarch64.tar.gz
3. Prepare the working directory

unzip docker-deploy.zip 
cp example.env .env

4.    Start the container

docker compose -f docker-compose.yml -f docker-compose.override.yml up -d

If started successfully, the information is as follows:

m5stack@raspberrypi:~/rsp/immich $ docker compose -f docker-compose.yml -f docker-compose.override.yml up -d
WARN[0000] /home/m5stack/rsp/immich/docker-compose.override.yml: the attribute `version` is obsolete, it will be ignored, please remove it to avoid potential confusion 
[+] Running 3/3
 ✔ Container immich_postgres  Started                                      1.0s 
 ✔ Container immich_redis     Started                                      0.9s 
 ✔ Container immich_server    Started                                      0.9s 

5.     Create a virtual environment

python -m venv mich

6.     Activate the virtual environment

source mich/bin/activate 

7.     Install dependency packages

pip install https://github.com/AXERA-TECH/pyaxengine/releases/download/0.1.3.rc1/axengine-0.1.3-py3-none-any.whl
pip install -r requirements.txt
pip install immich_ml-1.129.0-py3-none-any.whl # Precompiled package may be upgraded; use the actual file name.

8.     Start the immich_ml service

python -m immich_ml 

After running, you should see:

(mich) m5stack@raspberrypi:~/rsp/immich $ python -m immich_ml
[10/10/25 09:50:12] INFO     Starting gunicorn 23.0.0                           
[10/10/25 09:50:12] INFO     Listening at: http://[::]:3003 (8698)              
[10/10/25 09:50:12] INFO     Using worker: immich_ml.config.CustomUvicornWorker 
[10/10/25 09:50:12] INFO     Booting worker with pid: 8699                      
2025-10-10 09:50:13.589360675 [W:onnxruntime:Default, device_discovery.cc:164 DiscoverDevicesForPlatform] GPU device discovery failed: device_discovery.cc:89 ReadFileContents Failed to open file: "/sys/class/drm/card1/device/vendor"
[INFO] Available providers:  ['AXCLRTExecutionProvider']
/home/m5stack/rsp/immich/mich/lib/python3.11/site-packages/immich_ml/models/clip/cn_vocab.txt
[10/10/25 09:50:16] INFO     Started server process [8699]                      
[10/10/25 09:50:16] INFO     Waiting for application startup.                   
[10/10/25 09:50:16] INFO     Created in-memory cache with unloading after 300s  
                             of inactivity.                                     
[10/10/25 09:50:16] INFO     Initialized request thread pool with 4 threads.    
[10/10/25 09:50:16] INFO     Application startup complete.  

In your browser, enter the Raspberry Pi IP address and port 3003, for example: 192.168.20.27:3003

Note: The first visit requires registering an administrator account; the account and password are saved locally.

Once configured, you can upload images.

The first time, you need to configure the machine learning server. Refer to the diagram below to enter the configuration.

Set the URL to the Raspberry Pi IP address and port 3003, e.g., 192.168.20.27:3003.

If using Chinese search for the CLIP model, set it to ViT-L-14-336-CN__axera; for English search, set it to ViT-L-14-336__axera.

After setup, save the configuration.

The first time, you need to manually go to the Jobs tab and trigger SMART SEARCH.

Enter the description of the image in the search bar to retrieve relevant images.

Through this hands-on project, we’ve not only built a powerful smart photo album platform, but also experienced the exceptional performance of the M5Stack LLM‑8850 Card in edge AI computing. Whether setting up a private photo album on your Raspberry Pi or deploying intelligent image processing in security scenarios, the M5Stack LLM‑8850 Card delivers efficient, stable computing power you can rely on.


It brings AI closer to where your data resides, enabling faster, more secure processing and turning your ideas into reality. If you’re looking for a solution for on-device AI inference, give M5Stack LLM‑8850 Card a try — it might just become the core engine of your next project.

With the outstanding modular design, excellent user experience, and innovative integration of hardware and software ecosystems, the M5Stack Series was honored with the 2025 Good Design Award!

The Good Design Award, founded in Japan in 1957, celebrates products that combine aesthetic design with social impact. This year, the M5Stack Series stood out among thousands of entries for its modular system, open ecosystem, and design that empowers creativity across all levels.

Designed for Innovation

M5Stack is a modular prototyping tool for turning ideas into real products fast. It combines a durable enclosure, standardized expansion modules, and support for multiple programming languages. Its GUI environment, UIFlow, lowers the barrier for beginners while serving professionals, making hardware development simpler and more efficient.

Since its launch in 2017, M5Stack has built a vibrant global community of developers and educators. The series has become a common sight not only in schools, research institutions, and maker activities but also across industrial and IoT innovation projects. In Japan alone, dozens of introductory books have been published on IoT and robotics development using M5Stack.

Today, the M5Stack Series encompasses more than 400 products, widely used in education, industry, and embedded systems, significantly enhancing rapid development and fostering innovation.

Evaluation Comments from Jury members

The Good Design Award 2025 judges commended M5Stack :

M5Stack is a development platform featuring a modular design that allows users to freely combine a diverse lineup of modules. With its highly refined enclosure and attention to detail, it offers a level of aesthetic appeal and usability unmatched by conventional microcontroller boards—reminding users of the joy of creating tools born from their own imagination.

Supported by an active global community, M5Stack has found widespread use across various fields—from education and hobbyist projects to industrial and embedded product applications. Its standardized expansion system and GUI-based tools make it accessible for both beginners and advanced developers alike, offering a broad entry point into creative technology development.

As programming becomes more approachable in the age of AI, M5Stack is expected to play a key role in unlocking creativity across diverse groups of people, opening up new possibilities for innovation and making.

The official announcement: Good Design Award 2025 — M5Stack Seires

About GOOD DESIGN AWARD

GOOD DESIGN AWARD is a social movement to make people's lives, industries, and society more well-off through design. Since its start in 1957, it has gained widespread support along with its logo G Mark. GOOD DESIGN AWARD is for products, architecture, software, systems, and services that are relevant to people. Whether visible or invisible, anything that is constructed for some ideal or purpose is considered as design, and its quality is evaluated and honored. 

The GOOD DESIGN AWARD helps people to discover the possibilities of design and expand the fields where design can be used through screening and a wide range of promotion, and is dedicated to a well-off society where everyone can enjoy creative life.

The M5Stack Series has been officially included in the GOOD DESIGN AWARD Gallery, which archives and showcases all award-winning works by year since its establishment in 1957.

About M5Stack

Founded in 2017, M5Stack creates modular, open-source hardware development tools designed to streamline prototyping and productization. Based in Shenzhen, China, M5Stack has become a globally recognized developer platform for IoT, AIoT, and robotics solutions.

Learn more about M5Stack and explore our products: https://shop.m5stack.com/

If you've been wanting to use your devices remotely for a while, today you'll learn how to do it by integrating LoRa into Home Assistant.

Index

l  What is LoRa and how does it work?

l  Prerequisites

l  Mounting and configuring the LoRa Gateway

l  LoRa node configuration

l  Check the communication

l  Sending information

l  Customize your Gateway

l  Acknowledgments

What is LoRa and how does it work?

LoRa (an acronym for "Long Range") is a radio frequency communication protocol that enables long-distance data transmission (up to 10 km in open fields) with very low power consumption. Therefore, it offers two major advantages:

  • It has a much greater range than the protocols we commonly use (WiFi, Bluetooth, Zigbee, etc.). This makes it the ideal choice for remote sensors (storage rooms, mailboxes, large gardens, etc.).
  • It doesn't rely on the telephone or electrical network to transmit information, so different LoRa devices can communicate even during a power outage.

However, it also has its limitations, as its data transfer speed is slow. In practice, this means it's perfect for sending simple data (commands to our devices, numbers, or text strings), but it's not a suitable protocol for transmitting photos or videos.

Additionally, you should consider the frequency LoRa uses in your geographic area. For example, in Europe it's 868 MHz, while in the US and most of Latin America it's 915 MHz.

Prerequisites

To integrate LoRa into Home Assistant, you will need the following components:

  • A LoRa gateway that receives information from the various nodes and transmits it to Home Assistant. In this case, we're going to create a gateway with the M5Stack Core S3 SE (yes, the same one we already used to Activate Assist ), combined with the LoRa868 modules and an external battery (this is optional).
  • A LoRa node that collects and sends information (e.g., a connected sensor). In this case, we're going to use a board with the integrated SX1276 chip (which would also be a valid device to act as a LoRa gateway).
  • A  USB cable to power the DATA board  (  with a charging cable, you will not be able to install the software).
  • Having installed  ESPHome in Home Assistant.

Mounting and configuring the LoRa Gateway

We are going to be using the M5Stack Core S3 SE along with the LoRa868 V1.1 module (now the LoRa868 v1.2 module is available). This is a modular device that's very easy to expand by simply assembling the components.

Something important to keep in mind is that the LoRa module has some small switches on the back ('DIP switches') that modify the pin assignment, and logically, it must match what we indicate in the ESPHome code.

To do this, make sure the switches are in the following position (2, 6 and 7 on and the rest off).

From here, the process will be similar for any compatible motherboard (adapting the steps and connection diagram to the specifications of your device). The steps we followed are as follows:

1.      In Home Assistant, go to your ESPHome plugin  , tap “New device” and “Continue.”

2.    Give your device a name  (for example, “LoRa Gateway” )  and click “Next”.

3.    Select “ESP32-S3” as the device type . You'll notice that a new block has been created for your device in the background.

4.   Click “Skip” and click “Edit” above your device block.

5.    Add the following lines to the end of your code (which come directly from the ESPHome SX127x component, adapted to our device).

captive_portal:

spi:
  clk_pin: GPIO36 
  mosi_pin: GPIO37 
  miso_pin: GPIO35 

sx127x:
  cs_pin: GPIO6 
  rst_pin: GPIO7 
  dio0_pin: GPIO10 
  pa_pin: BOOST
  pa_power: 14
  bandwidth: 125_0kHz
  crc_enable: true
  frequency: 868920000
  modulation: LORA
  rx_start: true
  sync_value: 0x12
  spreading_factor: 7
  coding_rate: CR_4_5
  preamble_size: 8
  on_packet:
    then:
      - lambda: |-
          ESP_LOGD("lambda", "packet %s", format_hex(x).c_str());
          ESP_LOGD("lambda", "rssi %.2f", rssi);
          ESP_LOGD("lambda", "snr %.2f", snr);

button:
  - platform: template
    name: "Transmit Packet"
    on_press:
      then:
        - sx127x.send_packet:
            data: [0xC5, 0x51, 0x78, 0x82, 0xB7, 0xF9, 0x9C, 0x5C]

6.   Click “Save” and “Install.” Select “Manual download” and wait for the code to compile. 

7.   When finished, select the “Modern format” option to download the corresponding '.bin' file.

8.   Connect the M5Stack Core S3 SE to your computer using the USB-C data cable via the port on the side.

9.   Now go to the ESPHome page   and click "Connect." In the pop-up window,  select your board  and click "Connect."

10.   Now click on “Install” and select the '.bin' file obtained in step 7. Again, click on  “Install”.

11.  Return to Home Assistant and go to  Settings > Devices & Services. Your device should have been discovered and appear at the top, waiting for you to press the  "Configure" button. Otherwise, click the "Add integration" button, search for "ESPHome," and enter your board's IP address in the "Host" field. As always, we recommend assigning a static IP address to your router to avoid future issues if it changes.

LoRa node configuration

Now that we have our LoRa gateway, let's configure a node to send information to it. To do this, we'll follow steps very similar to those in the previous section:

1.      In Home Assistant, go to your ESPHome plugin  , tap  “New device”  and “Continue.”

2.    Give your device a name  (for example,  “LoRa Node” )  and click “Next”.

3.    Select “ESP32” as the device type  . You'll notice a new block has been created for your device in the background.

4.   Click “Skip” and click “Edit” above your device block.

5.    Add the following lines to the end of your code  (which in this case match the example of the  SX127x component of ESPHome).

captive_portal:

spi:
  clk_pin: GPIO5
  mosi_pin: GPIO27
  miso_pin: GPIO19

# Example configuration entry
sx127x:
  cs_pin: GPIO18
  rst_pin: GPIO23
  dio0_pin: GPIO26
  pa_pin: BOOST
  pa_power: 14
  bandwidth: 125_0kHz
  crc_enable: true
  frequency: 868920000
  modulation: LORA
  rx_start: true
  sync_value: 0x12
  spreading_factor: 7
  coding_rate: CR_4_5
  preamble_size: 8
  on_packet:
    then:
      - lambda: |-
          ESP_LOGD("lambda", "packet %s", format_hex(x).c_str());
          ESP_LOGD("lambda", "rssi %.2f", rssi);
          ESP_LOGD("lambda", "snr %.2f", snr);

button:
  - platform: template
    name: "Transmit Packet"
    on_press:
      then:
        - sx127x.send_packet:
            data: [0xC5, 0x51, 0x78, 0x82, 0xB7, 0xF9, 0x9C, 0x5C]

6.   Note that the pin assignment is different (because we're using a different device than the one we used for the Gateway), but the rest of the configuration is exactly the same as in the previous section. This is important so they can communicate with each other.

7.   Click “Save” and “Install.” Select  “Manual download”  and wait for the code to compile. 

8.   When finished, select the “Modern format” option to download the corresponding '.bin' file.

9.   Connect the board to your computer using the Micro USB data cable through the port on the side.

10.   Now go to the ESPHome page   and click "Connect." In the pop-up window,  select your board  and click "Connect."

11.  Now click on “Install” and select the '.bin' file obtained in step 8. Again, click on  “Install”.

12.    Return to Home Assistant and go to  Settings > Devices & Services . Your device should have been discovered and appear at the top, waiting for you to press the  "Configure" button . Otherwise, click the "Add integration" button, search for "ESPHome," and enter your board's IP address in the "Host" field. As always, we recommend assigning a static IP address to your router to avoid future issues if it changes.

Check the communication

Let's do a little test to check that both devices are communicating correctly (the Gateway and the node) .

1.      Make sure both devices are turned on and are online in Home Assistant and ESPHome.

2.    From Home Assistant, go to Settings > Devices & Services > ESPHome and access one of them (for example, the Gateway).

3.    Open a new window (without closing the previous one), enter the ESPHome plugin and access the logs of the other device (in this case, the node).

4.   In the Home Assistant window, click the "Transmit Packet" button. You'll immediately see the logs from the second device recording the incoming packet.

You can perform a reverse test to verify that communication is working both ways. If everything went well, your devices are now communicating.

Sending information

Logically, the point of integrating LoRa into Home Assistant is to send some kind of useful information (such as the value of a sensor connected to the node).

1.      The first step is to add the sensor you're interested in to the node board. For example, we're going to add a PIR sensor to get the long-awaited motion sensor on the mailbox. To do this, we've added the following code snippet:

binary_sensor:
  - platform: gpio
    pin: GPIO34
    name: "PIR Sensor"
    device_class: motion
    id: pir_sensor

2.    If you look at the code above, it's the same one we would use in any "normal" scenario. However, to send the information to our LoRa Gateway, we need to add something extra using the 'Packet Transport' component.

packet_transport:
  platform: sx127x
  update_interval: 5s
  encryption: "password"
  rolling_code_enable: true
  binary_sensors:
    - pir_sensor

3.    Analyze the code above and observe the following:

·        In the 'encryption' attribute, you have to indicate the encryption key for your message (whatever you want), so that it cannot be received by anyone on the same frequency.

·        We've identified the ID of the sensor we want to send (in this case, the binary sensor with the ID "pir_sensor") . You can add any other sensors you're interested in here.

4.   Now we are going to add the following to the code of our LoRa Gateway, so that it receives the information.

packet_transport:
  platform: sx127x
  update_interval: 5s
  providers:
    - name: lora-node
      encryption: "password"

binary_sensor:
  - platform: packet_transport
    id: pir_sensor
    provider: lora-node

  - platform: template
    name: "Buzón"
    device_class: motion
    lambda: return id(pir_sensor).state;

5.    Now we’re going to add the following to the code of our LoRa Gateway, so it can receive the information.

Again, analyze the code and note the following:

l We have specified the ESPHome device name of our LoRa node as the data provider.

l In the ‘encryption’ attribute, we have indicated exactly the same key as in the node.

l To transform the information received into a gateway sensor, we used the “packet_transport” platform. We assigned it an “id” (you can choose any) and again indicated the LoRa node name as the provider. This is an internal ESPHome sensor.

l To display this information in Home Assistant, we created a template sensor of the same type, assigning it the value of the internal sensor created in the previous step.

6.   And that's it! If you now check your gateway device in Home Assistant, you’ll see that it already shows the information from the node.

Customize your Gateway

Since we used the M5Stack Core S3 SE to integrate LoRa into Home Assistant, we can take advantage of its other features to customize it! Below, we're leaving you the full code to create a screen that notifies you when you receive letters in your mailbox!

esphome:
  name: lora-gateway
  friendly_name: LoRa Gateway
  libraries:
    - m5stack/M5GFX@^0.1.11
    - m5stack/M5Unified@^0.1.11

esp32:
  board: esp32-s3-devkitc-1
  framework:
    type: esp-idf

psram:
  mode: octal
  speed: 80MHz

external_components:
  - source:
      type: git
      url: https://github.com/m5stack/M5CoreS3-Esphome
    components: [ m5cores3_display ]
    refresh: 0s

# Enable logging
logger:

# Enable Home Assistant API
api:
  encryption:
    key: "1QrsXUgryxlF6OGsIwLj7eijyy/OMhSobQQHYWPvpb0="

ota:
  - platform: esphome
    password: "4844c4205ab6ab665c2d1a4be82deb57"

wifi:
  ssid: !secret wifi_ssid
  password: !secret wifi_password

  # Enable fallback hotspot (captive portal) in case wifi connection fails
  ap:
    ssid: "Lora-Gateway Fallback Hotspot"
    password: "6BRaaV17Iebb"

captive_portal:

spi:
  clk_pin: GPIO36 
  mosi_pin: GPIO37 
  miso_pin: GPIO35 

sx127x:
  cs_pin: GPIO6 
  rst_pin: GPIO7 
  dio0_pin: GPIO10 
  pa_pin: BOOST
  pa_power: 14
  bandwidth: 125_0kHz
  crc_enable: true
  frequency: 868920000
  modulation: LORA
  rx_start: true
  sync_value: 0x12
  spreading_factor: 7
  coding_rate: CR_4_5
  preamble_size: 8
  on_packet:
    then:
      - lambda: |-
          ESP_LOGD("lambda", "packet %s", format_hex(x).c_str());
          ESP_LOGD("lambda", "rssi %.2f", rssi);
          ESP_LOGD("lambda", "snr %.2f", snr);

packet_transport:
  platform: sx127x
  update_interval: 5s
  providers:
    - name: lora-node
      encryption: "password"

binary_sensor:
  - platform: packet_transport
    id: pir_sensor
    provider: lora-node

  - platform: template
    name: "Buzón"
    device_class: motion
    lambda: return id(pir_sensor).state;

color:
  - id: green
    hex: 'bfea11'
  - id: red
    hex: 'ff0000'

font:
  - file: "gfonts://Roboto"
    id: font_title
    size: 18
  - file: "gfonts://Roboto"
    id: font_text
    size: 16

image:
  - file: mdi:mailbox
    id: buzon_off
    resize: 100x100
    type: grayscale
    transparency: alpha_channel
  - file: mdi:email-alert
    id: buzon_on
    resize: 100x100
    type: grayscale
    transparency: alpha_channel

display:
  - platform: m5cores3_display
    model: ILI9342
    dc_pin: 15
    update_interval: 1s
    id: m5cores3_lcd
    lambda: |-
      // Obtener dimensiones de la pantalla
      int screen_width = it.get_width();
      int screen_height = it.get_height();
      
      // Título en la parte superior con margen de 20px
      it.print(screen_width/2, 20, id(font_title), id(green), TextAlign::TOP_CENTER, "LoRa Gateway by Aguacatec");
      
      // Obtener estado del sensor del buzón
      bool mailbox_open = id(pir_sensor).state;
            
      if (mailbox_open) {
        // Buzón abierto - icono rojo
        it.image(110, 70, id(buzon_on), id(red));
        it.print(screen_width/2, 200, id(font_text), id(red), TextAlign::CENTER, "Carta recibida!!");
      } else {
        // Buzón cerrado - icono verde
        it.image(110, 70, id(buzon_off), id(green));
        it.print(screen_width/2, 200, id(font_text), id(green), TextAlign::CENTER, "No hay correspondencia");
      }

Acknowledgements

To prepare this post, this video by our friend Miguel Ángel (from La Choza Digital) was extremely helpful! 

Source: AguacaTEC

Author: TitoTB